Devil’s Food Cake
on Jan 12, 2024, Updated Dec 16, 2024
This post may contain affiliate links. Please read our disclosure policy.
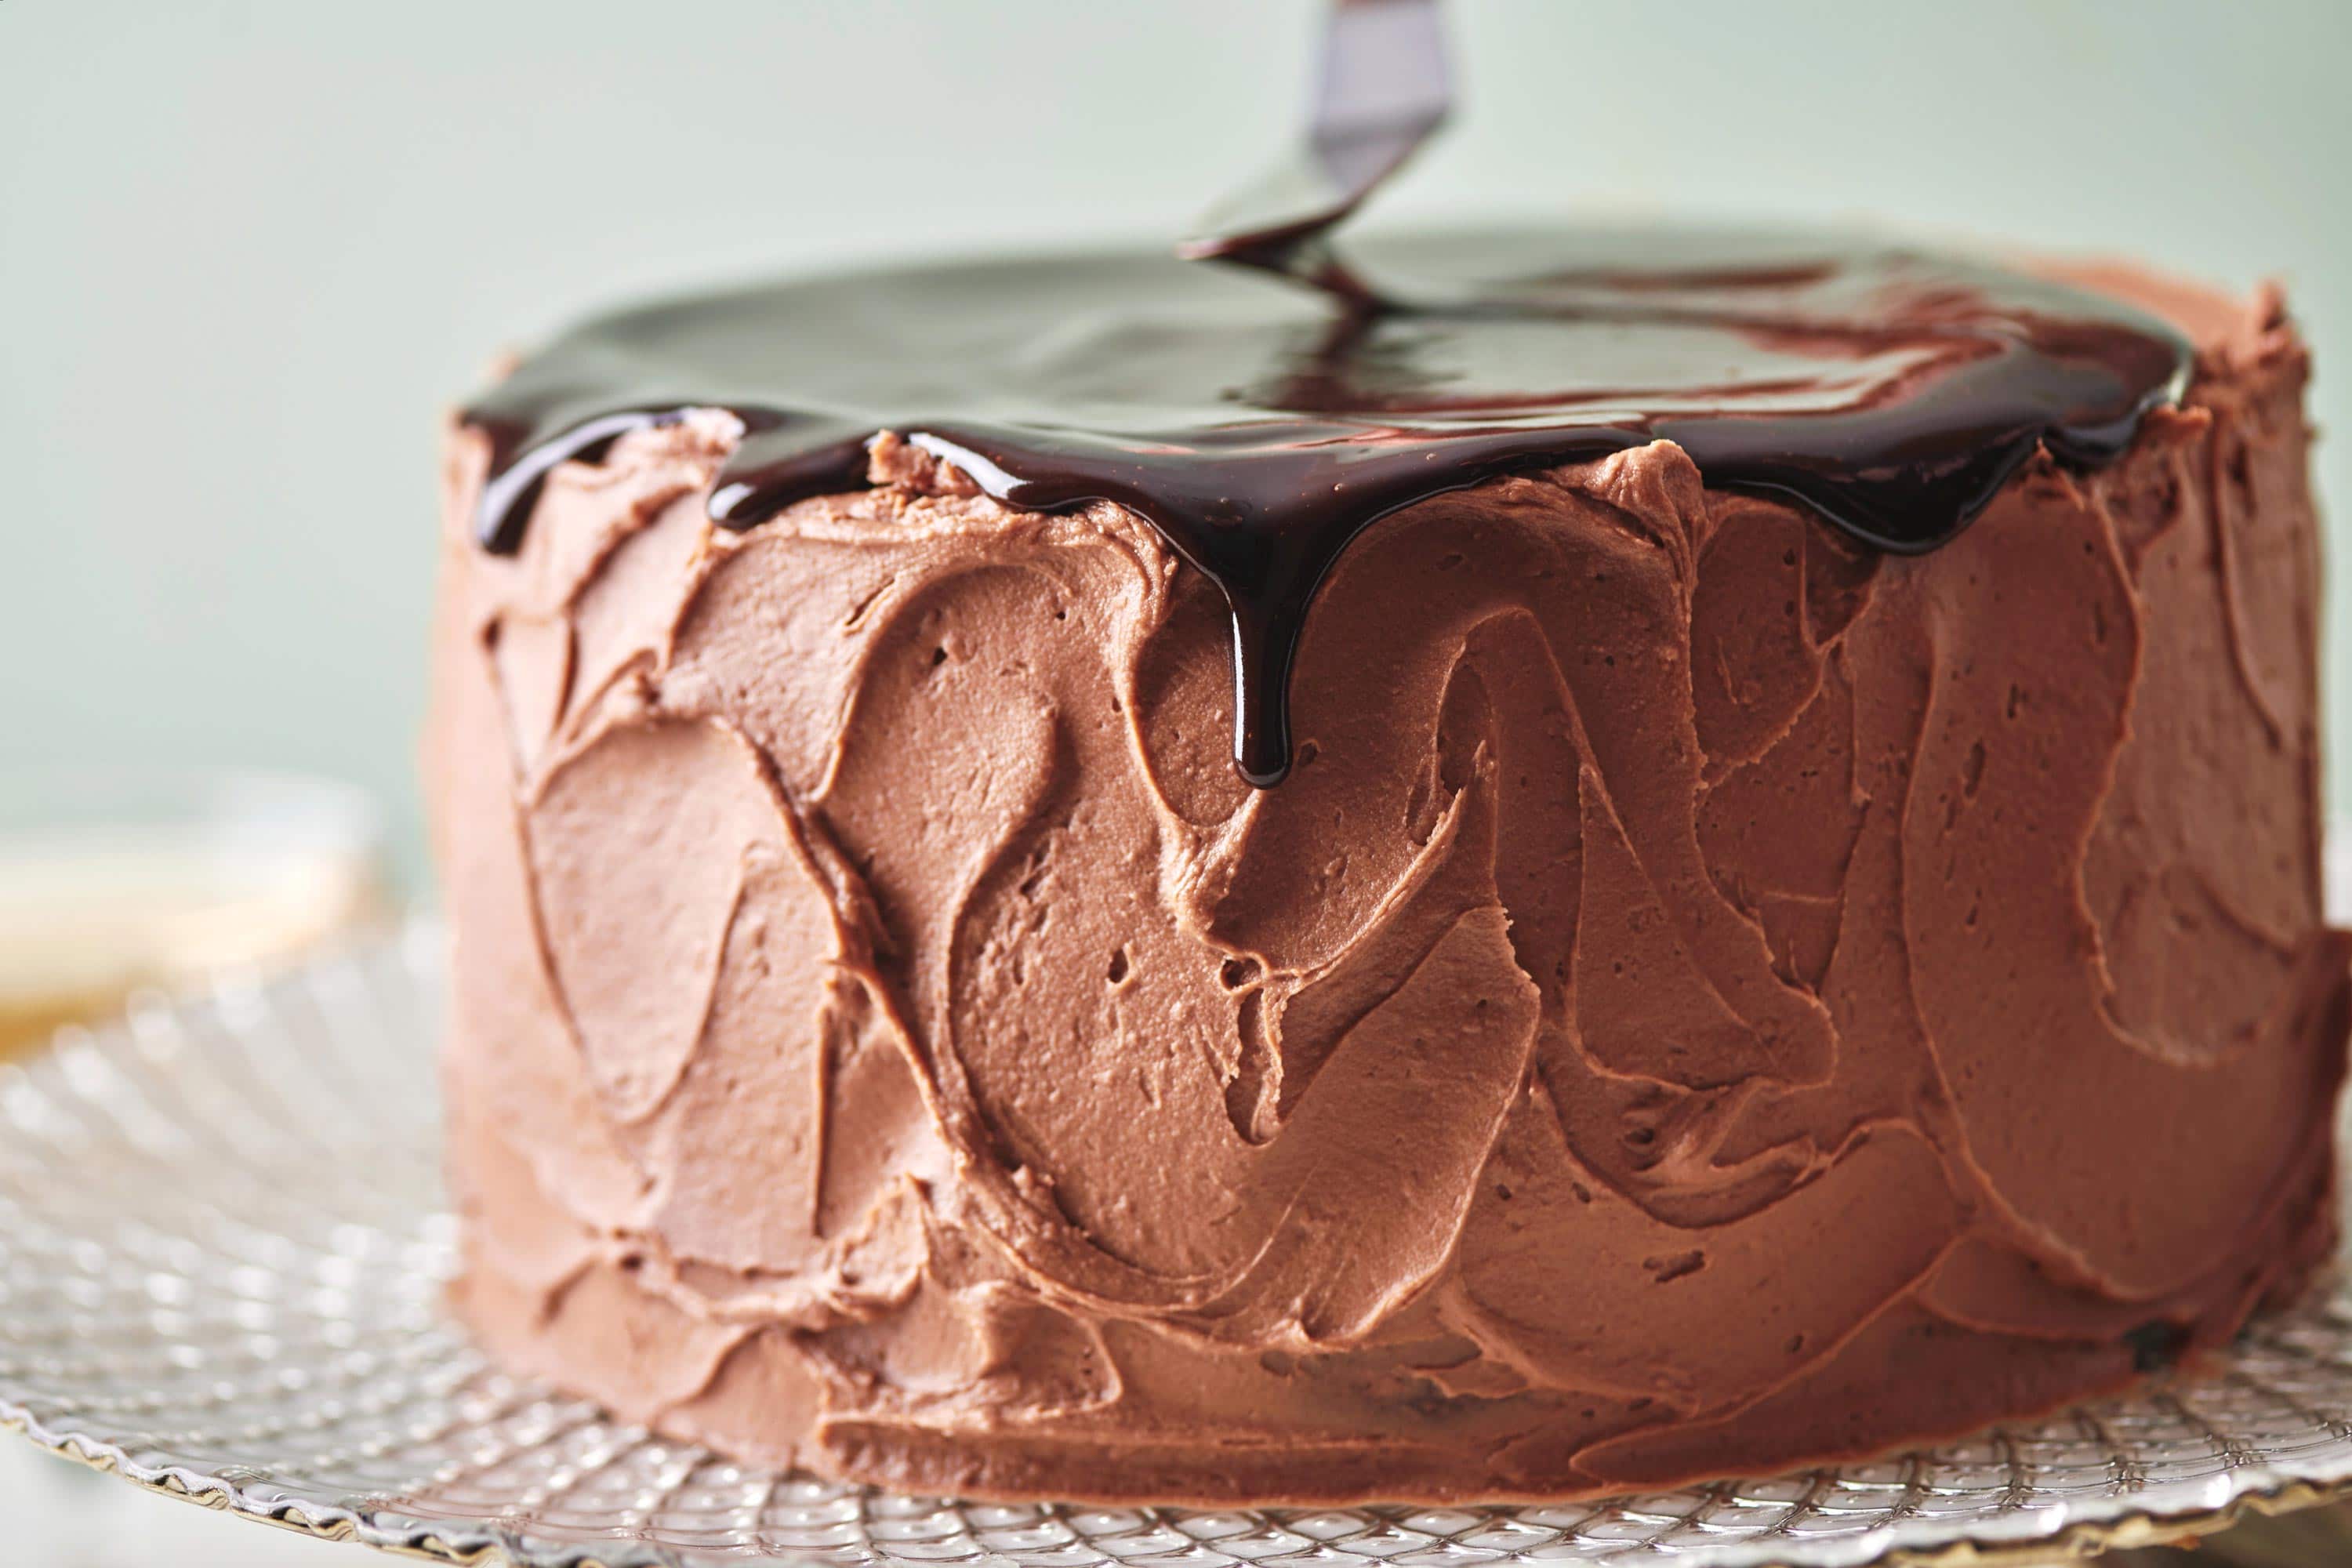
Rich and chocolatey and hits all the best notes. The fudgy topping over the chocolate buttercream is truly easy yet optional (but you know you want it).
If you say the words Devil’s Food Cake in front of some people, their eyes will noticeably light up, and their chins will lift as though they are ready to spring into action. It’s just one of those cakes with a true and devoted fan base, and if you’ve ever had a good Devil’s Food Cake, you surely understand why.
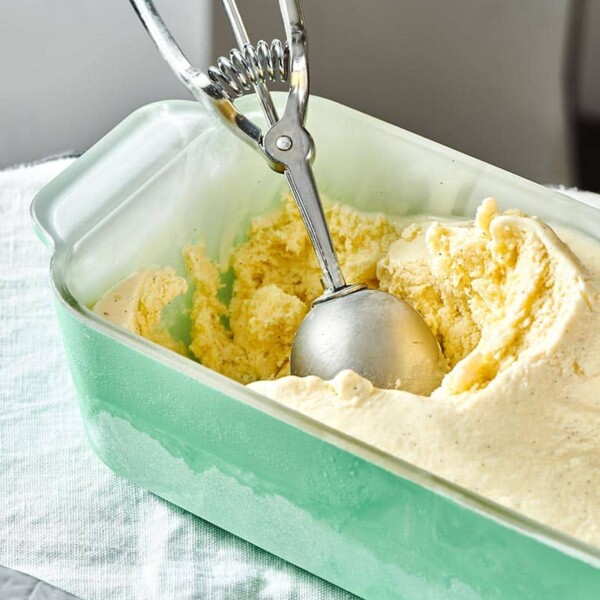
There is an optional sauce topping to this rich, luxurious-tasting chocolate cake, which I highly recommend: try mocha sauce or caramel sauce. But you might also think about plunking down a generous scoop of No Churn Ice Cream.
By signing up, you agree to our Privacy Policy.
What's In This Post?
Devil’s Food Cake: Rich and chocolatey; hits all the best notes. The fudgy topping over the chocolate buttercream is truly easy yet optional (but you know you want it).
Ingredients
- Unsalted butter – Unsalted is the best choice here, as it allows us to control the salt level in the cake.
- All-purpose flour or Gluten-Free 1-to-1 Baking Flour – You can find more info below on how to make this delicious cake gluten-free!
- Unsweetened cocoa powder – Provides the chocolate flavor!
- Hot brewed coffee – I love the way hot coffee elevates the chocolate flavor — you don’t taste the coffee, really, but it amplifies the chocolatiness of the cake.
- Baking soda and baking powder – These two leaveners work together to make the cake rise and become light. And read on if you’ve ever wondered if you can substitute baking soda for baking powder.
- Kosher salt – A pinch of salt helps to bring out all of the other flavors.
- Granulated sugar and dark brown sugar – A combo of sugar gives this cake the best levels of sweetness and texture.
- Pure vanilla extract – Amazingly, vanilla works to amplify the flavor of the chocolate.
- Large eggs – Room-temperature eggs blend more easily into the batter.
- Sour cream – As the name implies, this will make the batter extra creamy! Plus, it’ll add a bit more tanginess.
- Chocolate Buttercream – This decadent frosting is — pun intended — the icing on the cake.
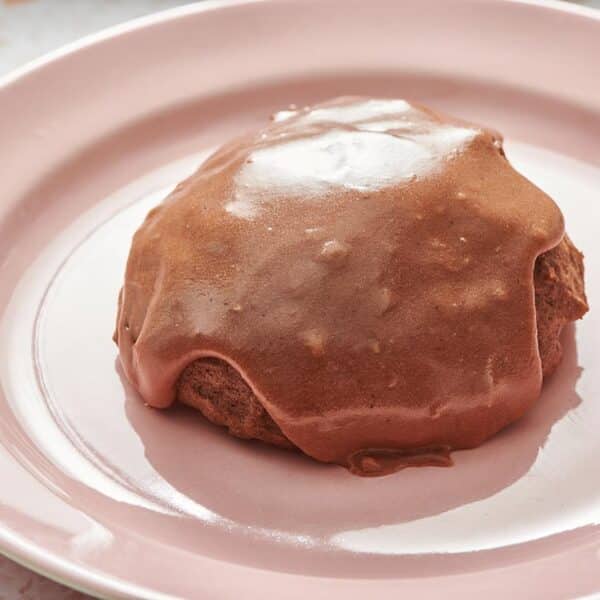
- Chocolate Fudge or Mocha Sauce – This last topping will take your cake from rich and fancy to sky’s the limit: rich and fancy.
What Is Devil’s Food Cake?
For starters, yes, it’s a chocolate cake. But what makes it Devil’s Food Cake? The most basic answer is that it’s made with cocoa powder, which is intensely chocolatey, and this cake always contains baking soda. The baking soda helps activate the cocoa powder, which makes the cake a deeper chocolatey brown color and emphasizes the rich chocolate flavor. It is also moister and more tender than many chocolate cakes, in this cake partly thanks to the sour cream…(and butter and eggs, of course).
Variations and Substitutions
I have made this cake with both all-purpose flour and Bob’s Red Mill’s Gluten-Free 1-to-1 Baking Flour. I’m always curious if a gluten-free baked good can be as delicious as a gluten-full version. And it was! As the name suggests, you simply sub it in for “regular” flour on a 1-to-1 ratio and need to do no additional tweaking to the recipe.
It was completely delicious, turned out perfectly, and if I didn’t know it was gluten-free, I wouldn’t have known it was gluten-free. And I never mentioned it was gluten-free to my family, and they just said, “Great cake, Ma.”
How to Make Devil’s Food Cake
- Prep your oven and pans: Preheat the oven to 350 degrees. Grease and flour two 8-inch round baking pans.
- Combine the cocoa and coffee.
- Mix together flour, salt, and leaveners.
- Make the batter: Beat together the butter and sugar until light and fluffy. Add the eggs one at a time. Beat in the vanilla, then the coffee mixture. Add the wet and dry ingredients alternately until incorporated.
- Bake the cakes: Divide the mixture between the two pans and bake for 45 to 55 minutes, until a wooden skewer inserted in the middle of the pan comes out clean.
- Cool the cakes: Allow the cake to rest in the pans on a wire rack for 10 to 15 minutes, then carefully turn them out and cool completely on wire racks.
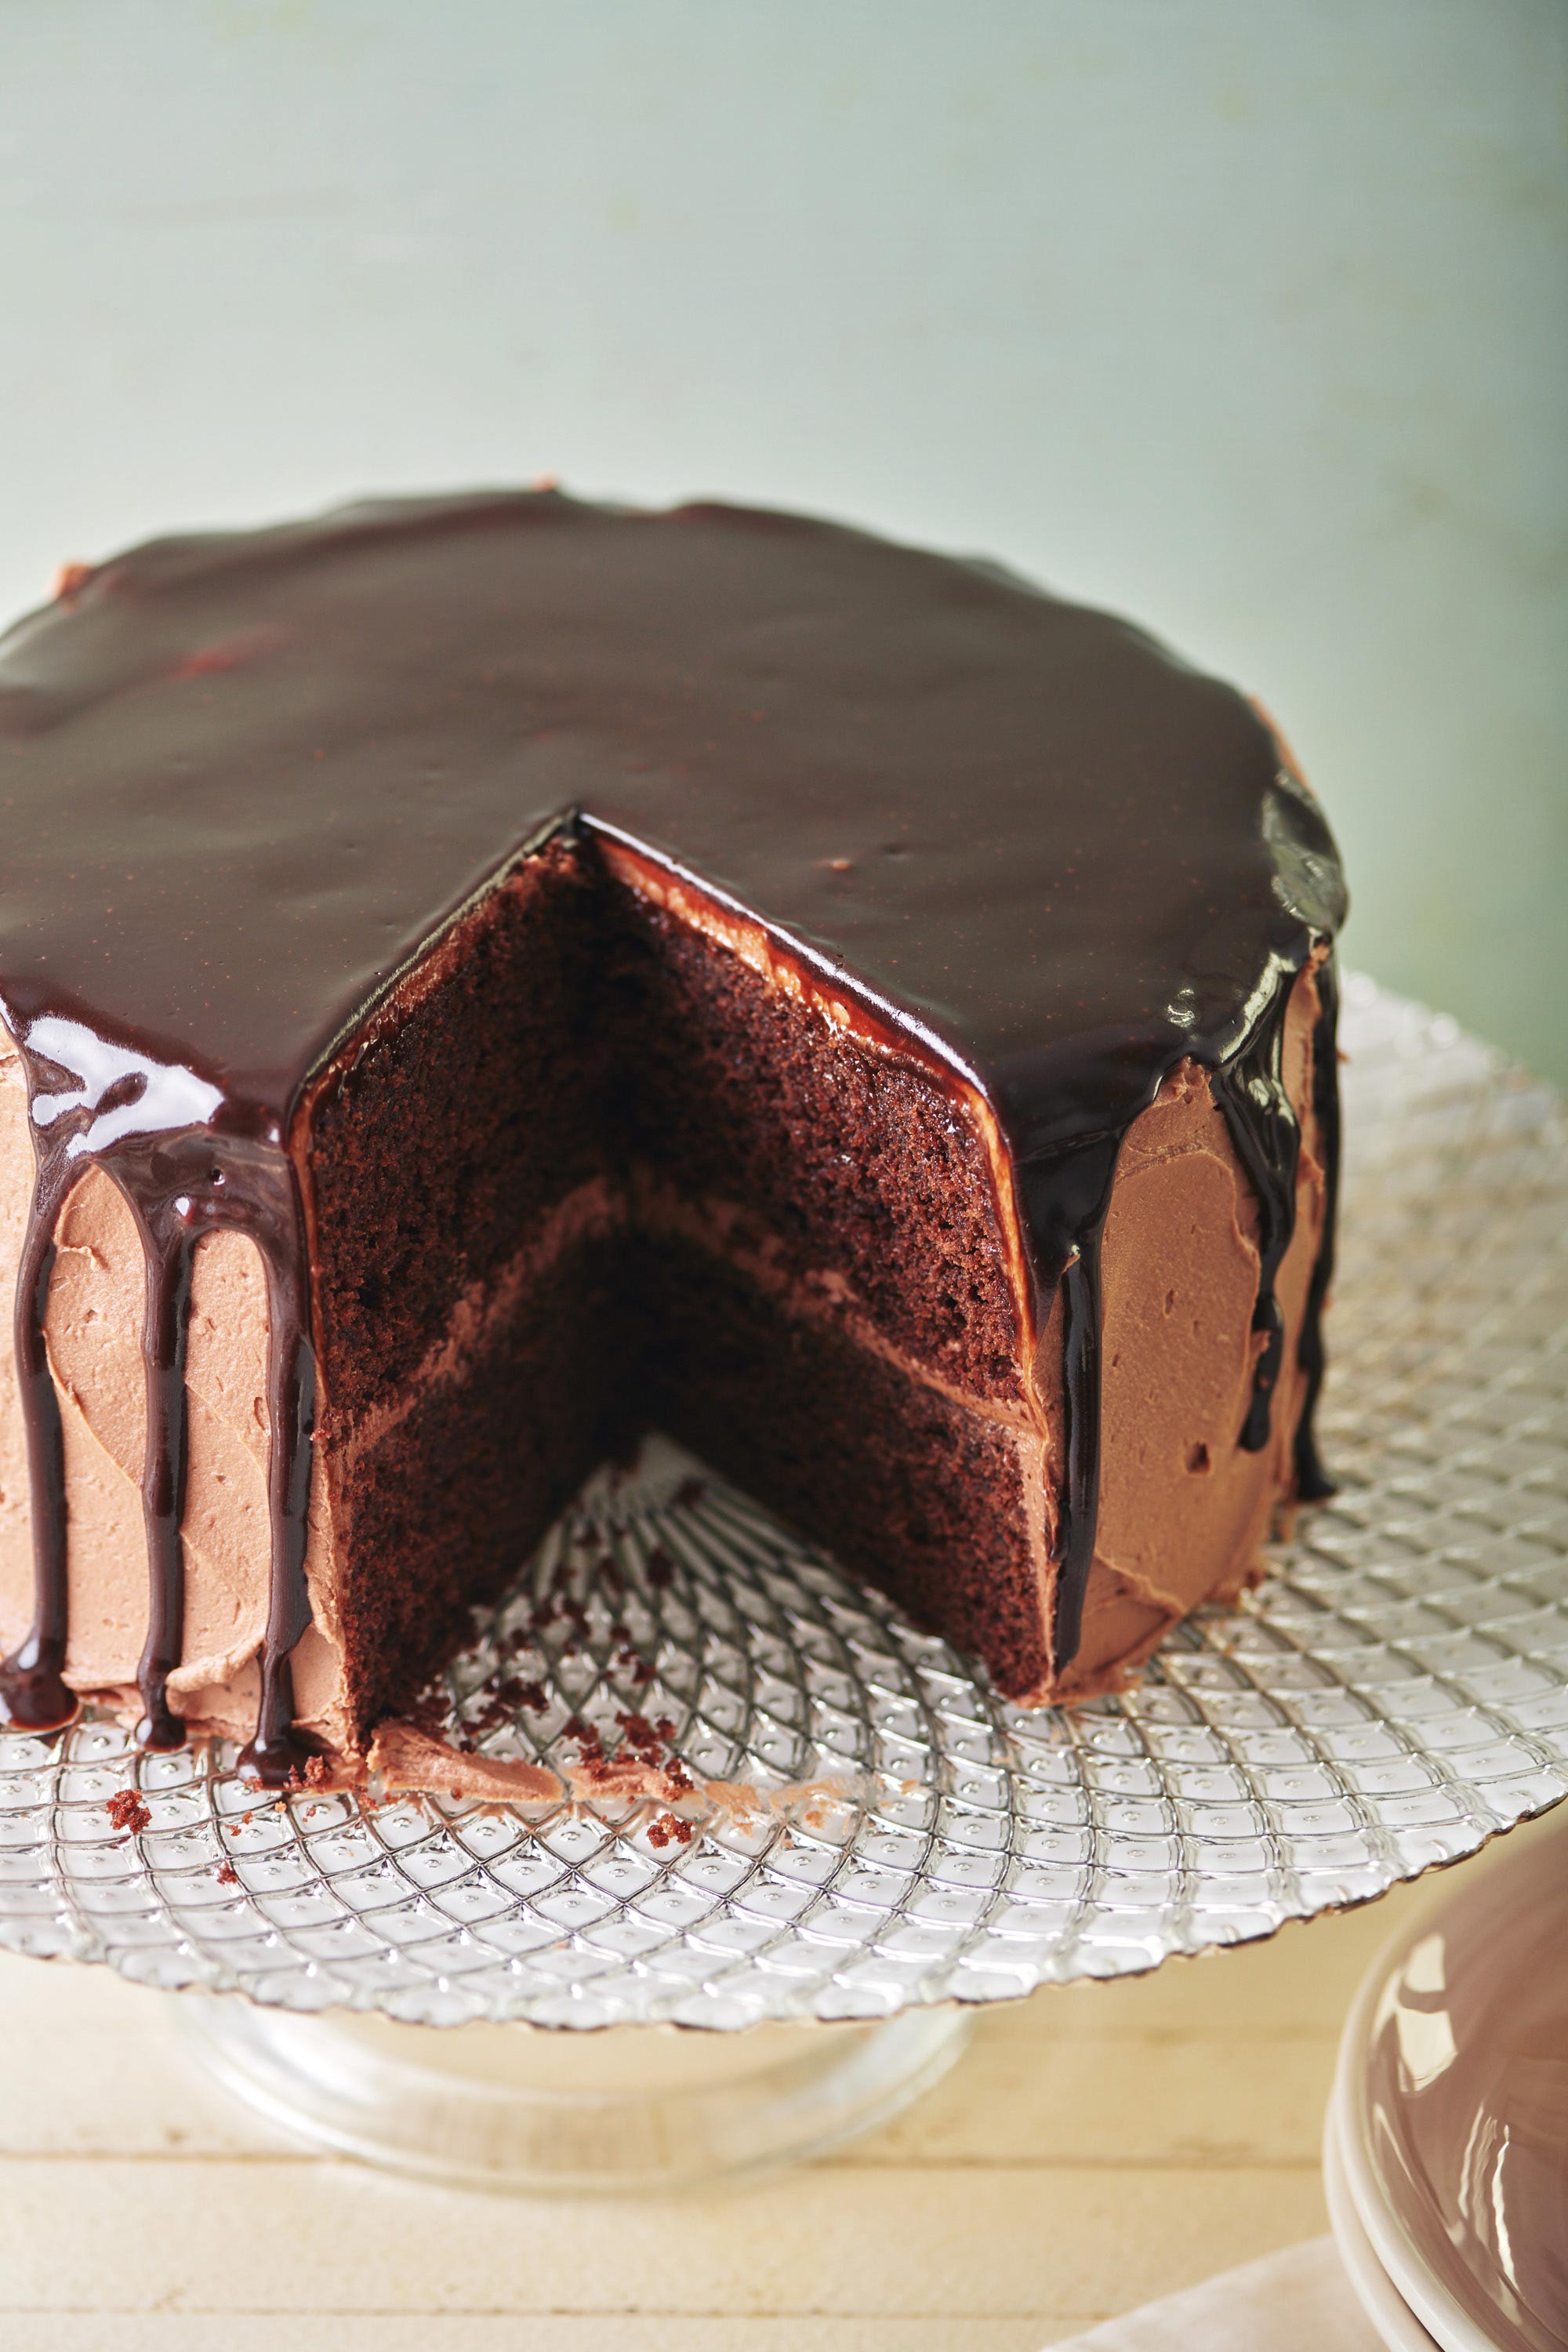
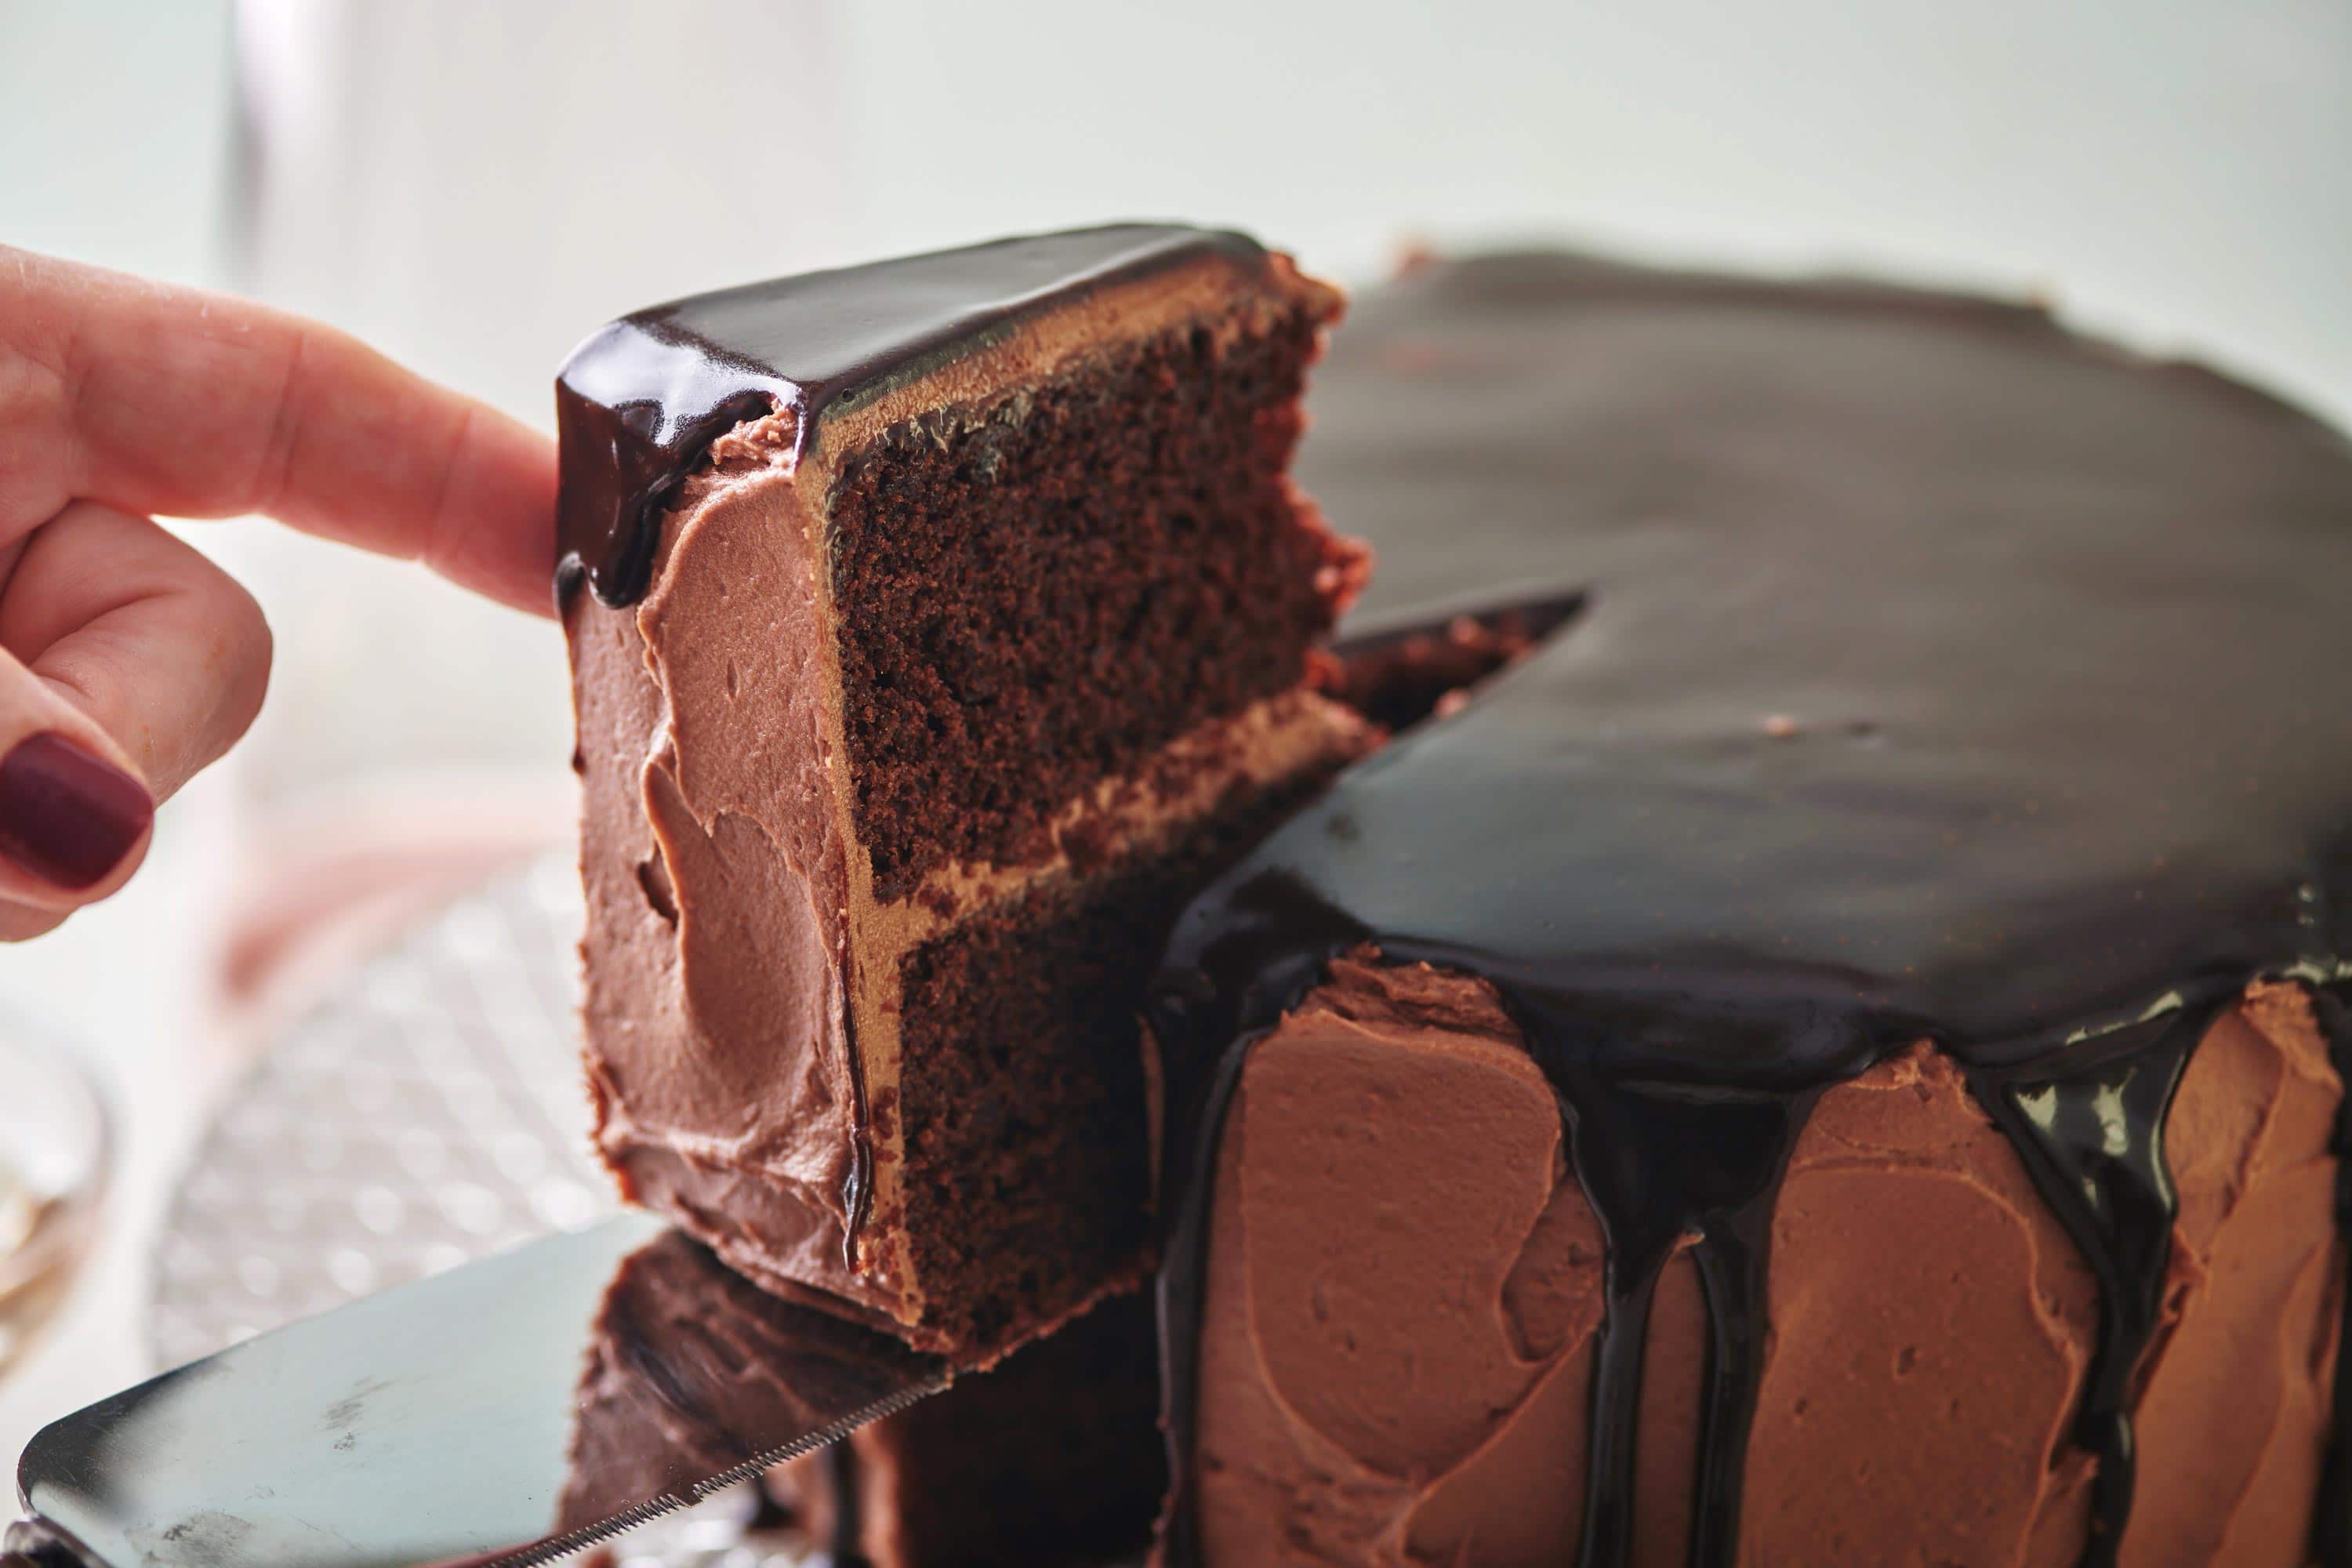
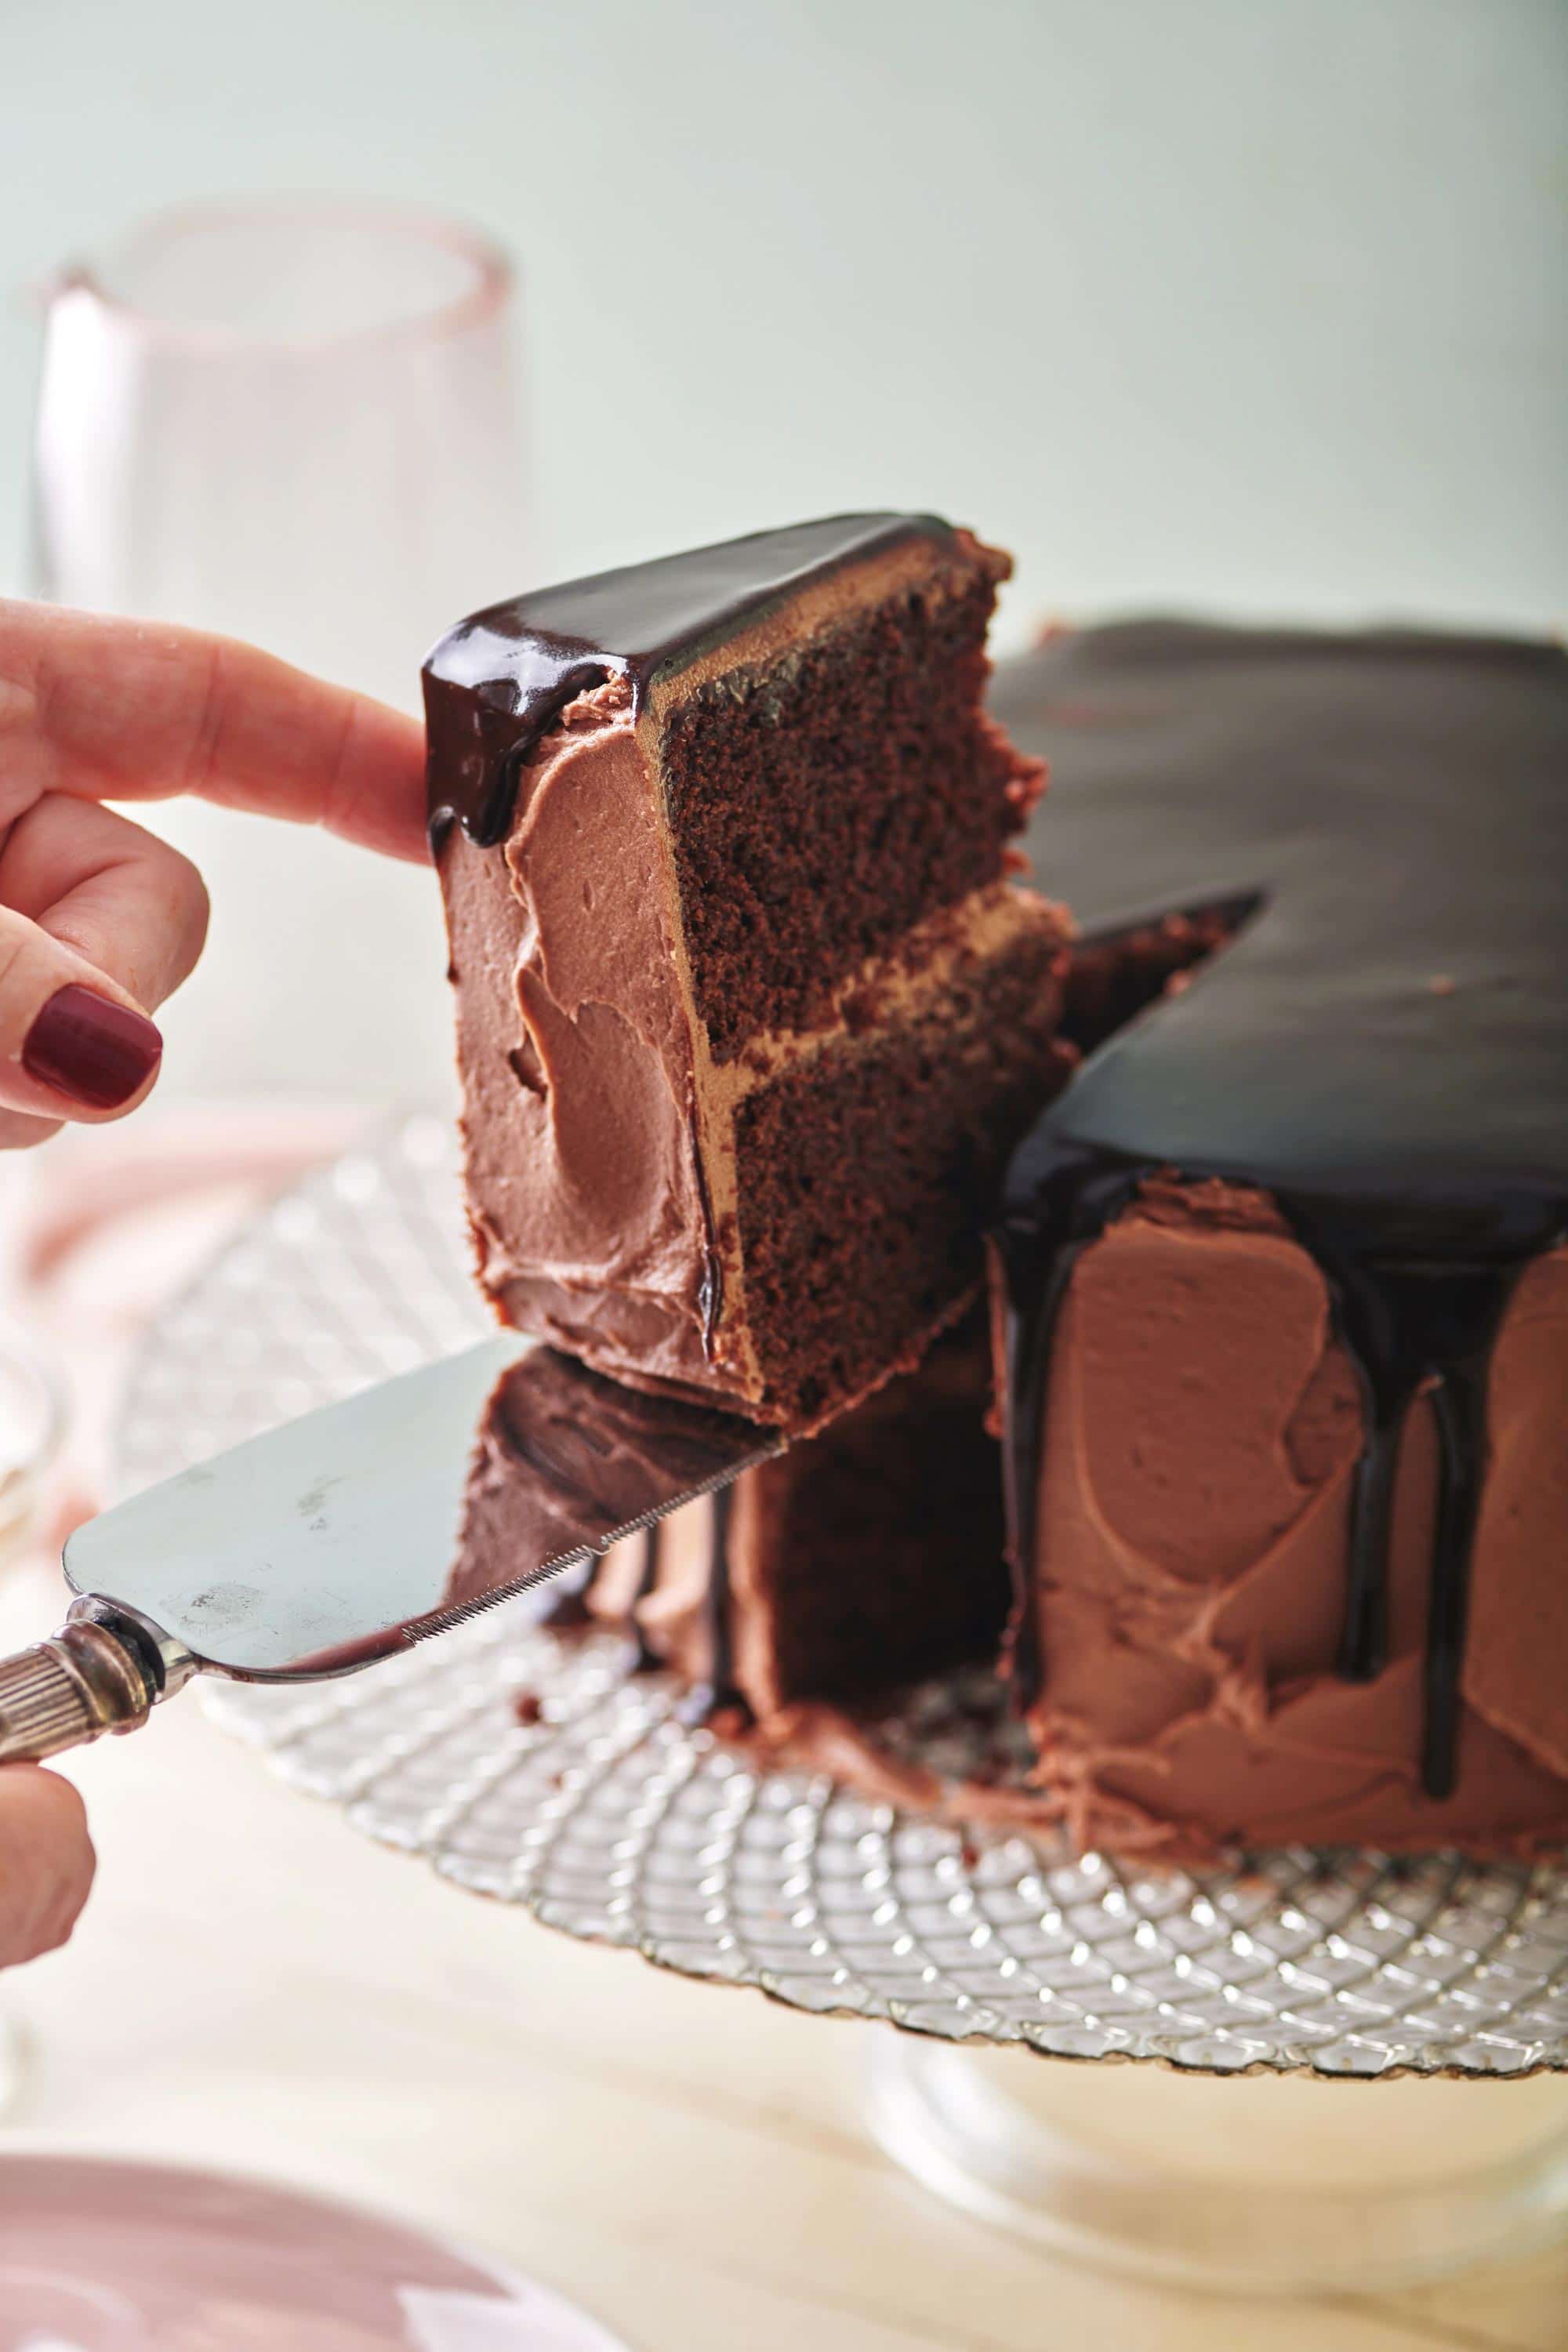
- Assemble the cake: Place one cake layer upside down on a round of cardboard or a flat plate. Using an offset spatula or a butter knife, frost the top of the bottom layer with a generous layer of the Chocolate Buttercream. Place the second cake layer upside down on top of the bottom layer, and frost the top and the sides of the cake with a thin layer of Chocolate Buttercream.
- Let the frosting set: Place the cake in the freezer for 15 minutes or in the refrigerator for 30 minutes to firm up the thin layer of frosting.
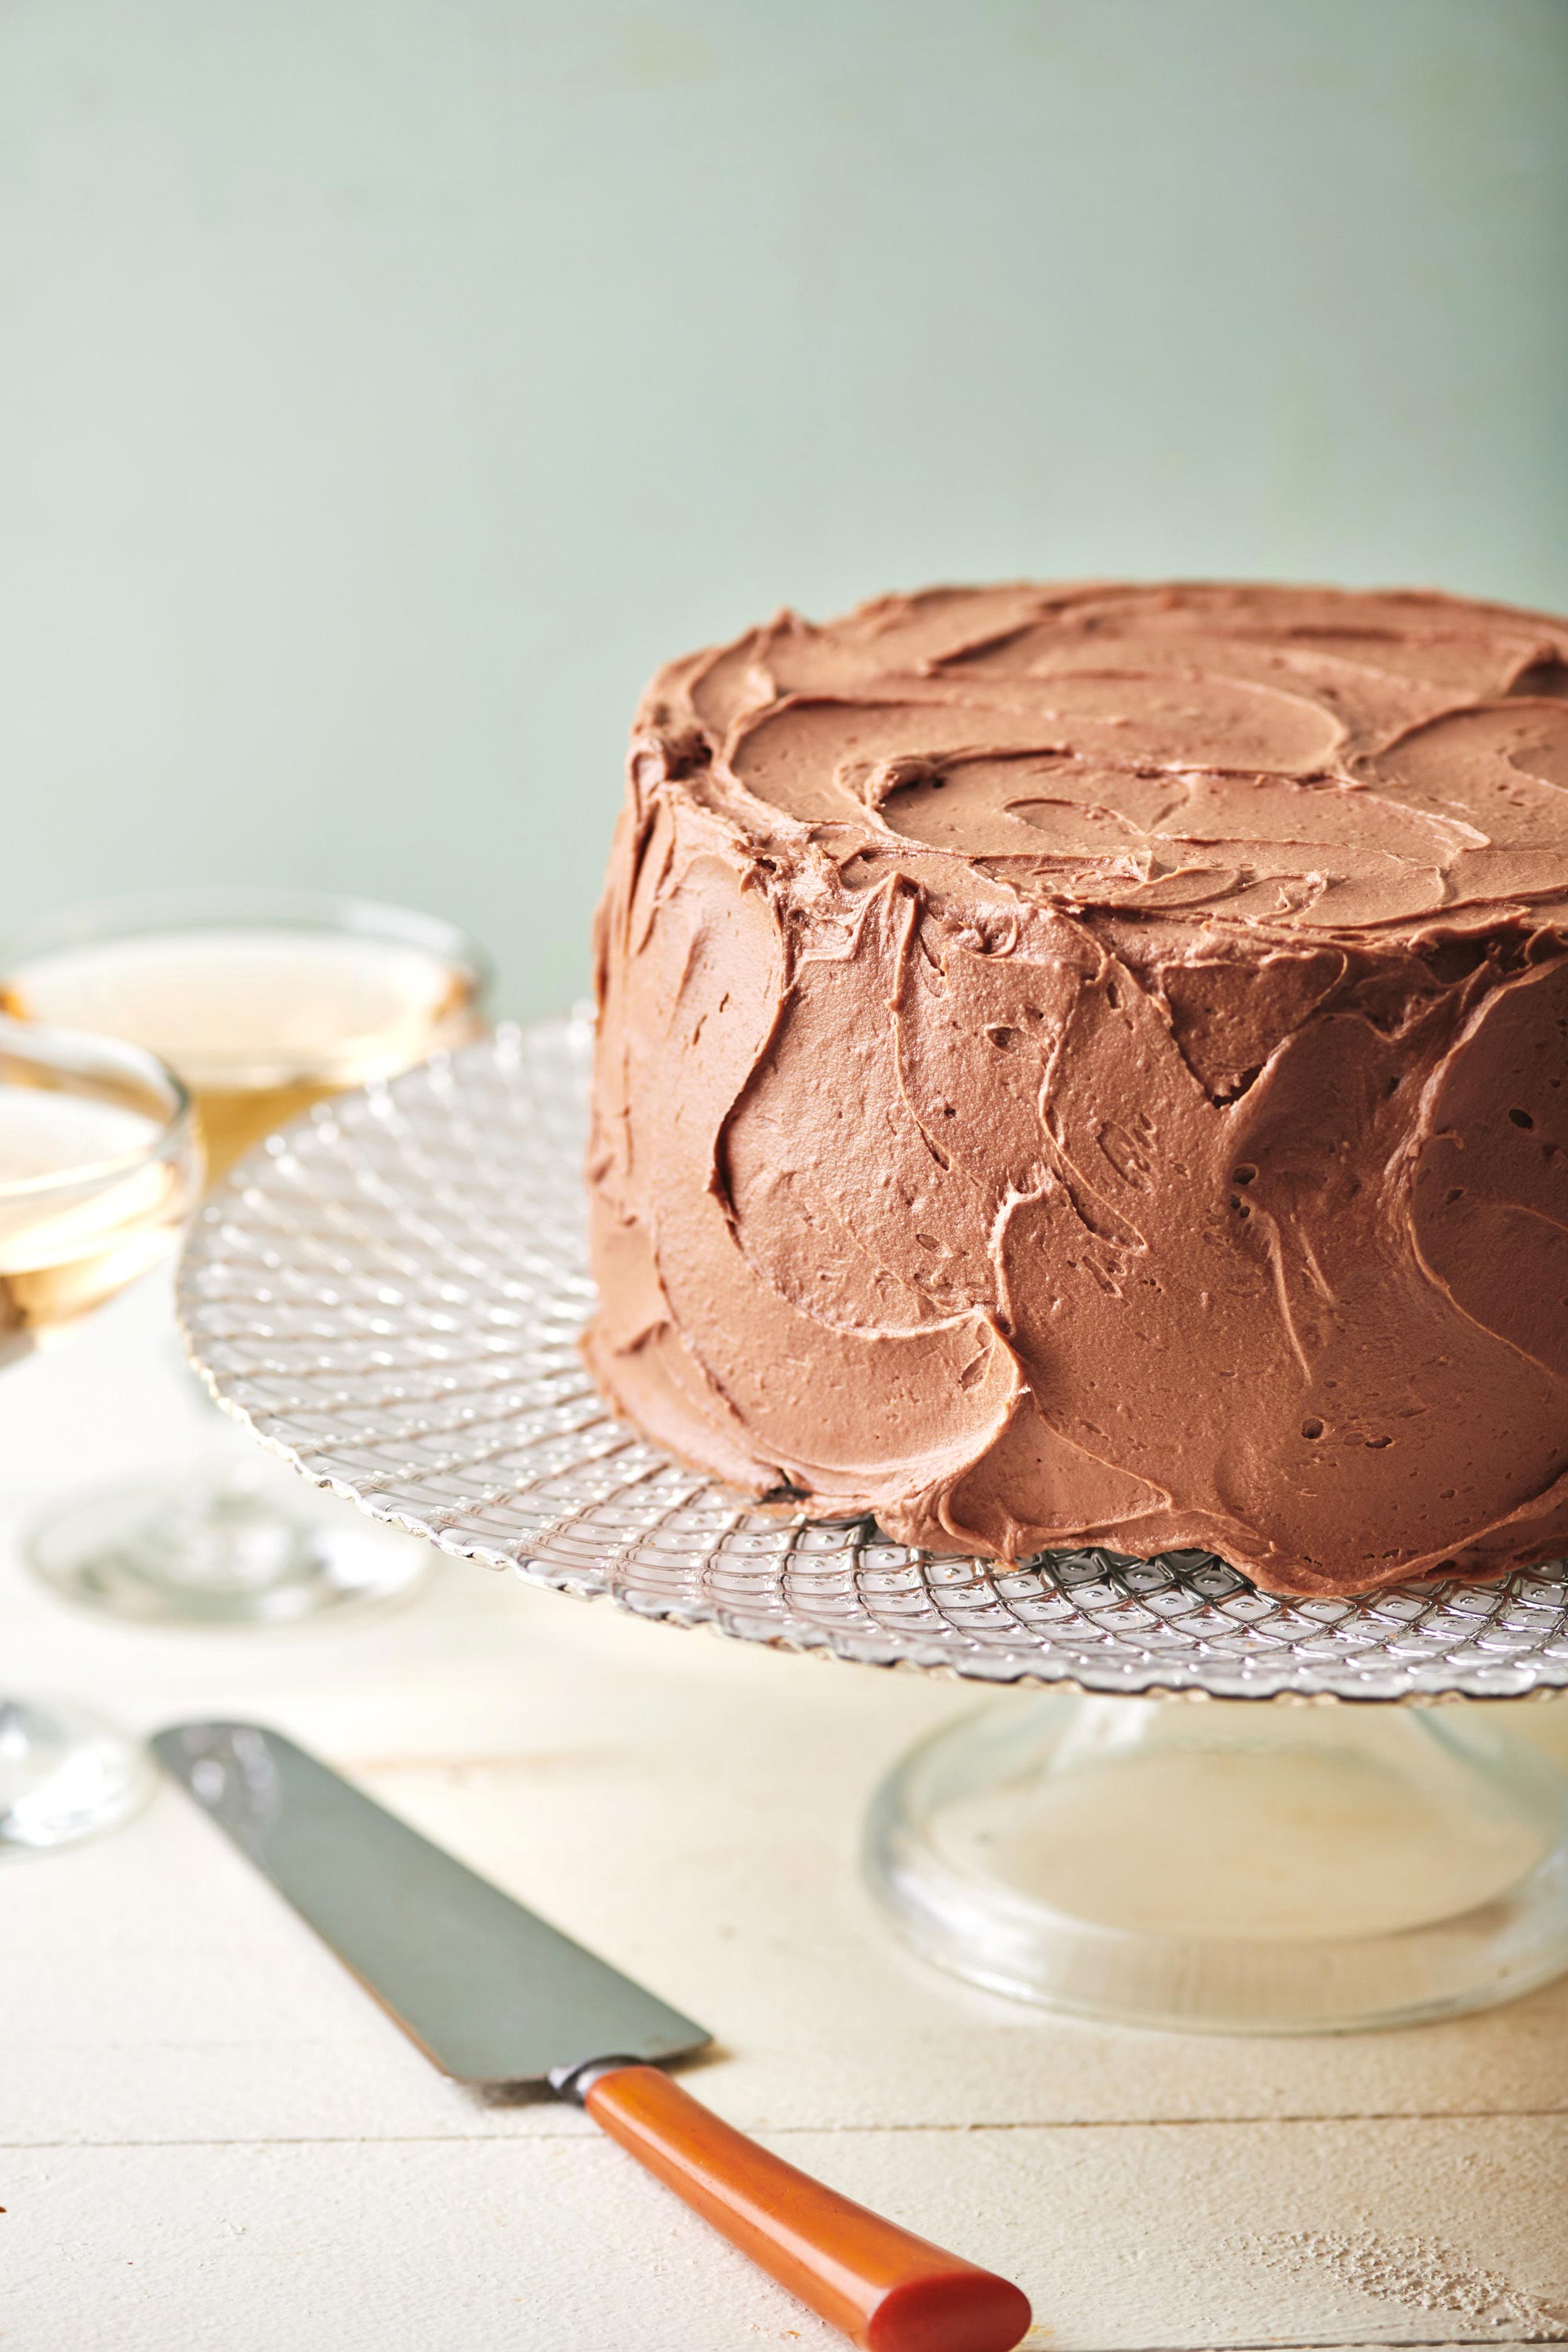
- Frost the cake: Remove the cake from the fridge/freezer and frost the top and the sides with a generous layer of buttercream, making it as smooth or as swoopy as you like.
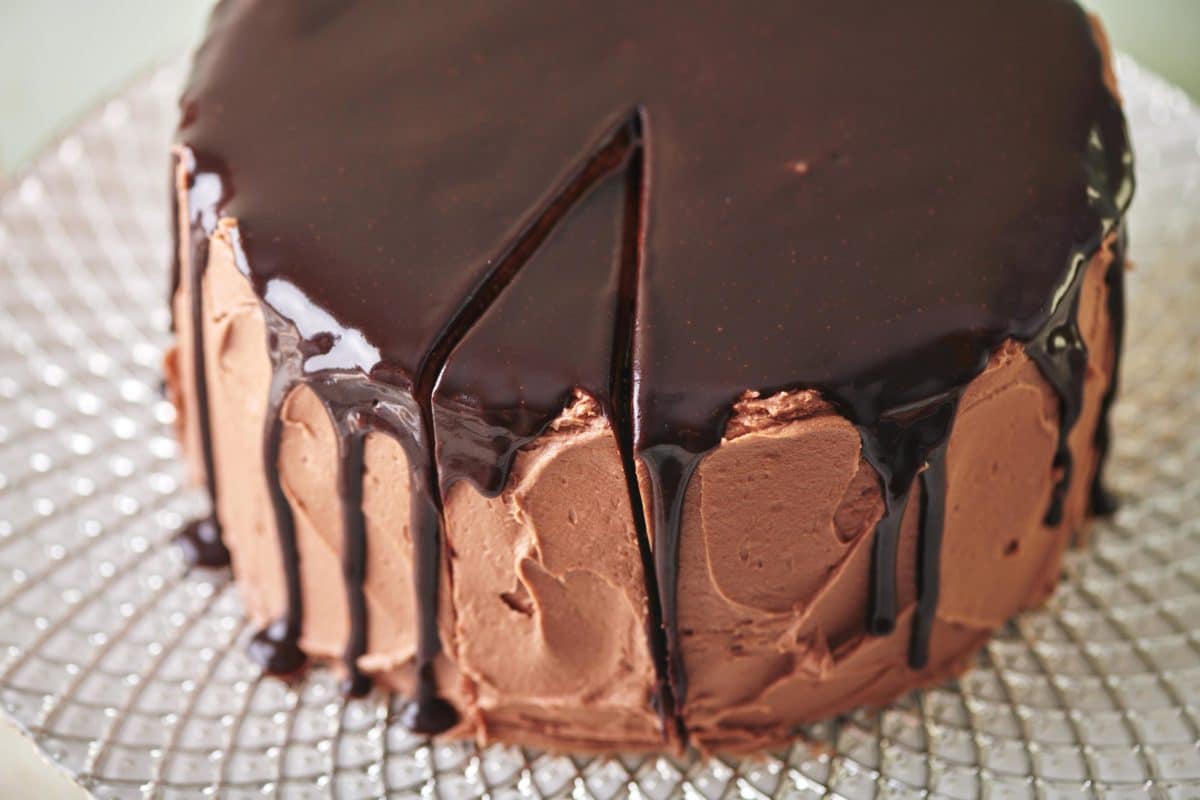
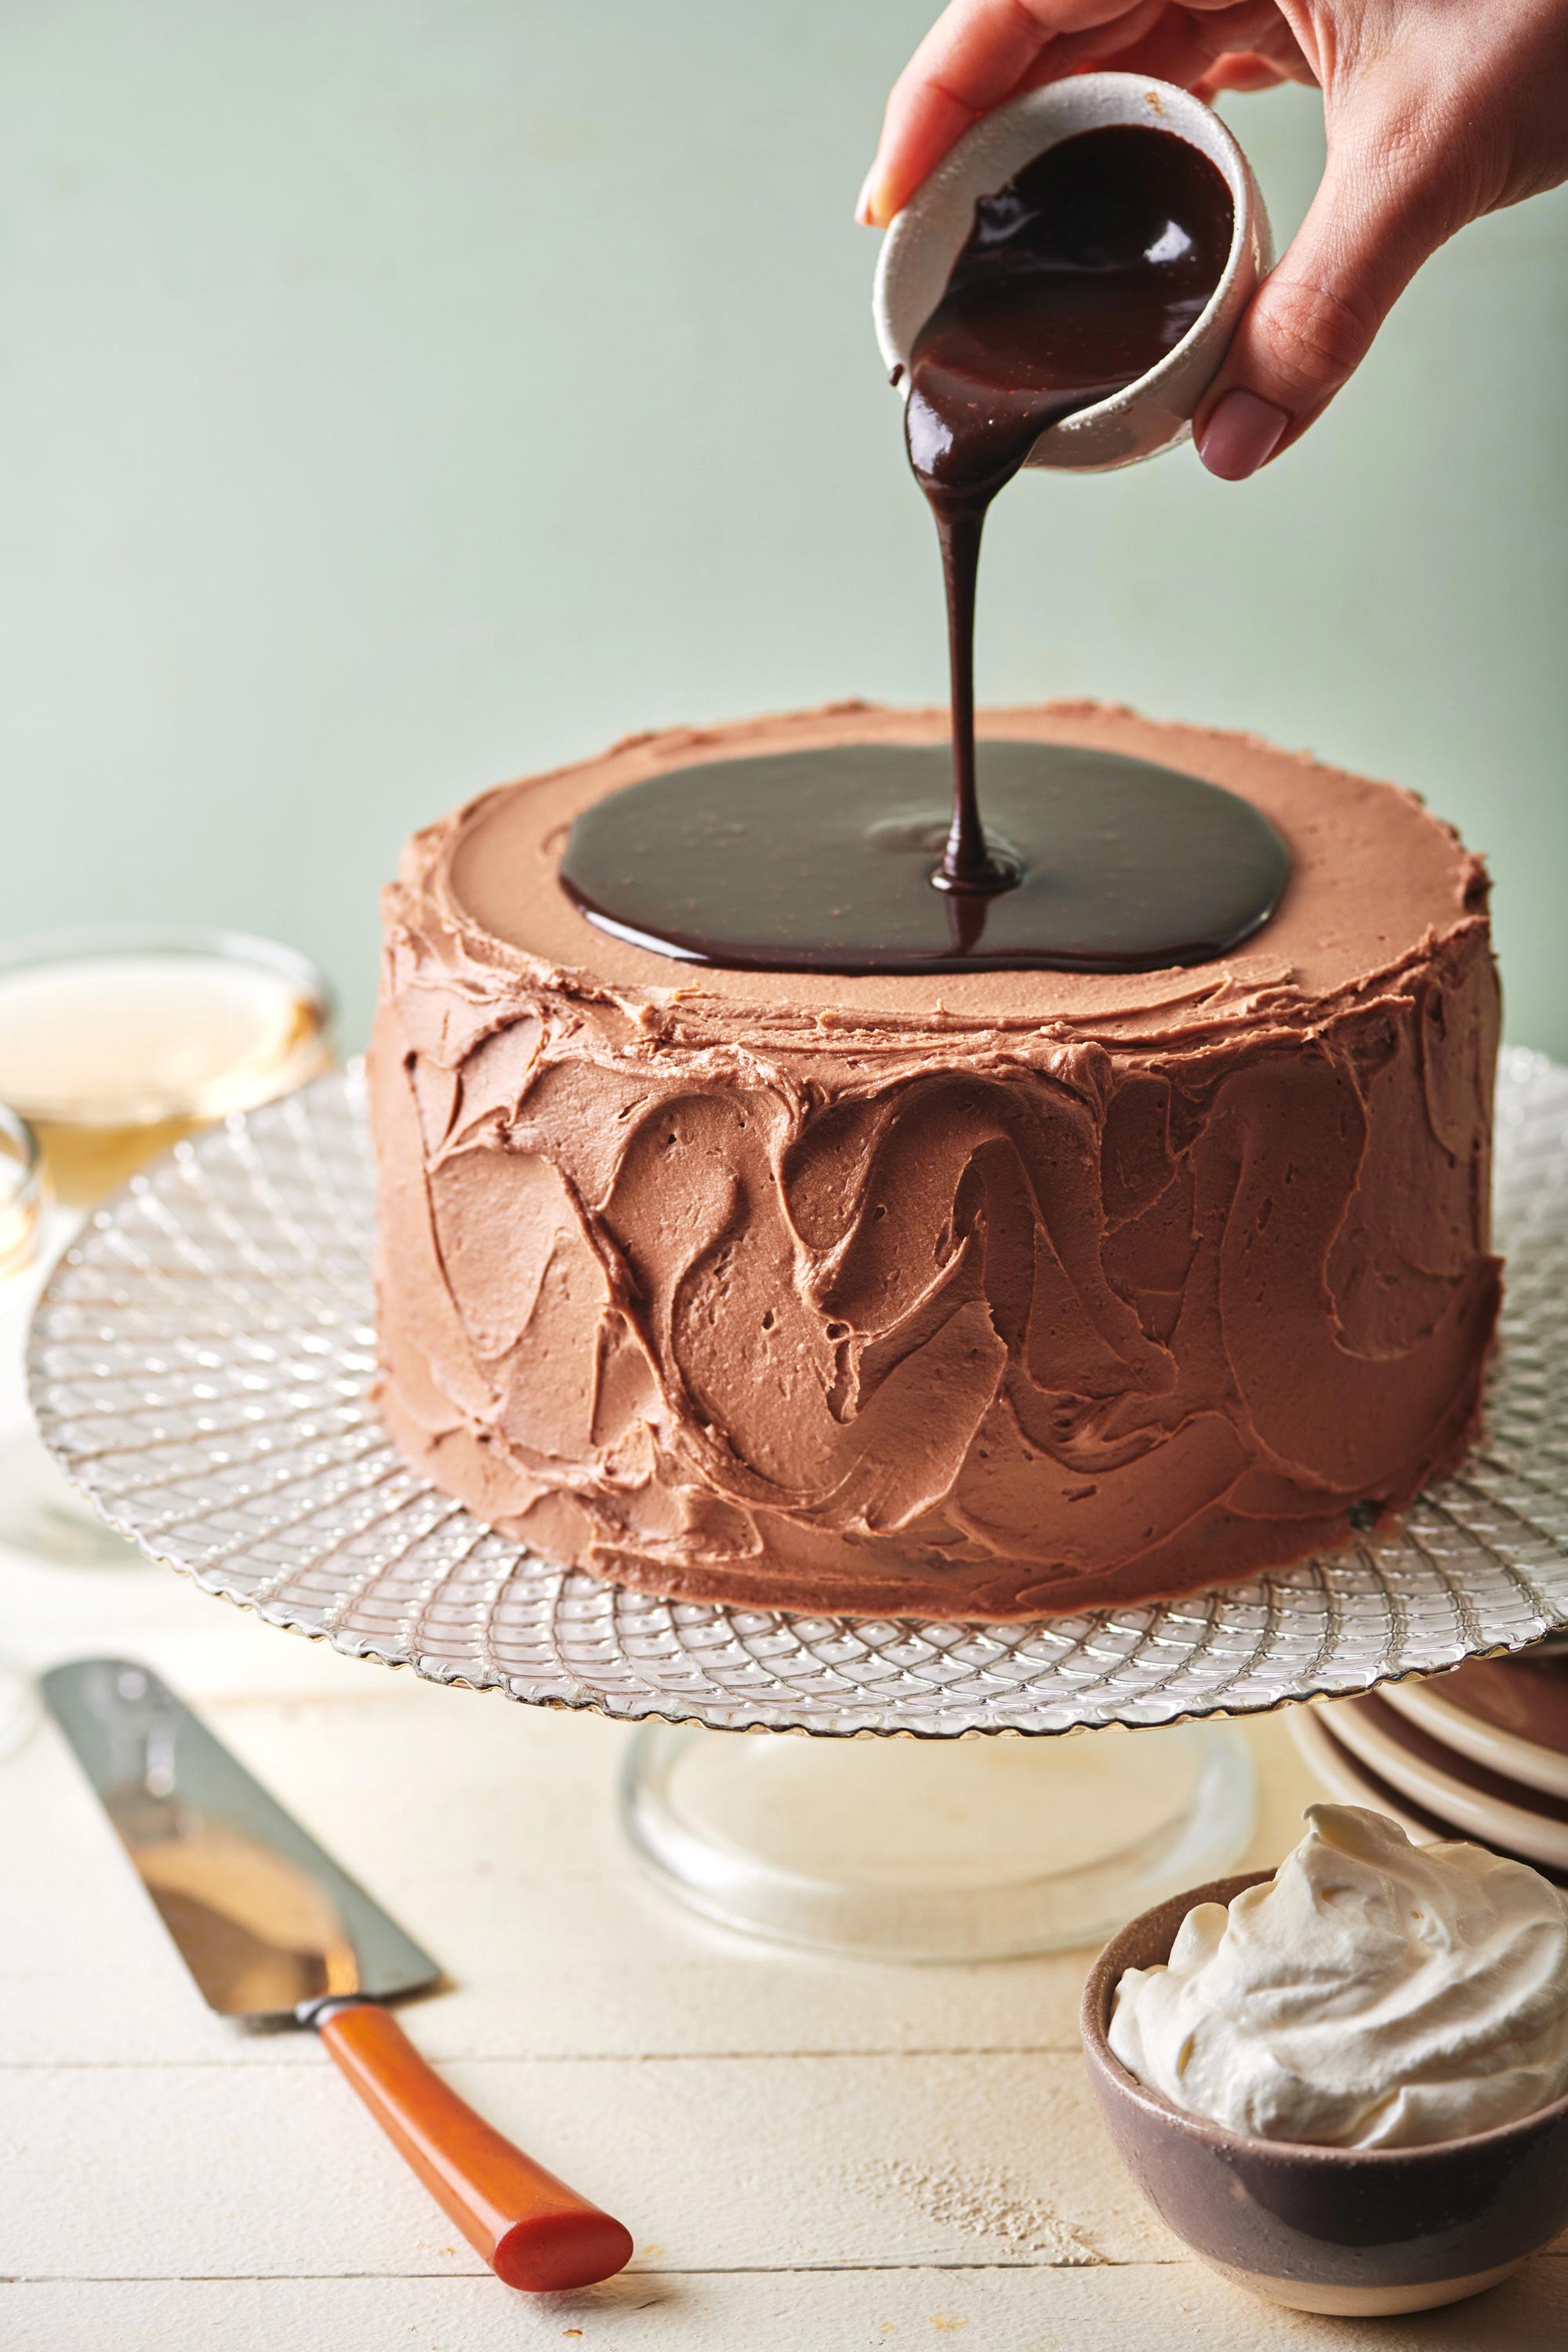
- Top with chocolate or mocha sauce: If you would like to add the topping, make sure the top is very smooth. Warm the sauce until it is pourable but still thick, and pour it slowly in a circle over the top, working your way towards the edges. Use a spoon, knife, or offset spatula to help the topping drip over the sides in random spots to create gorgeous chocolatey drips. Place the cake in the fridge for at least 15 minutes to firm up the sauce.
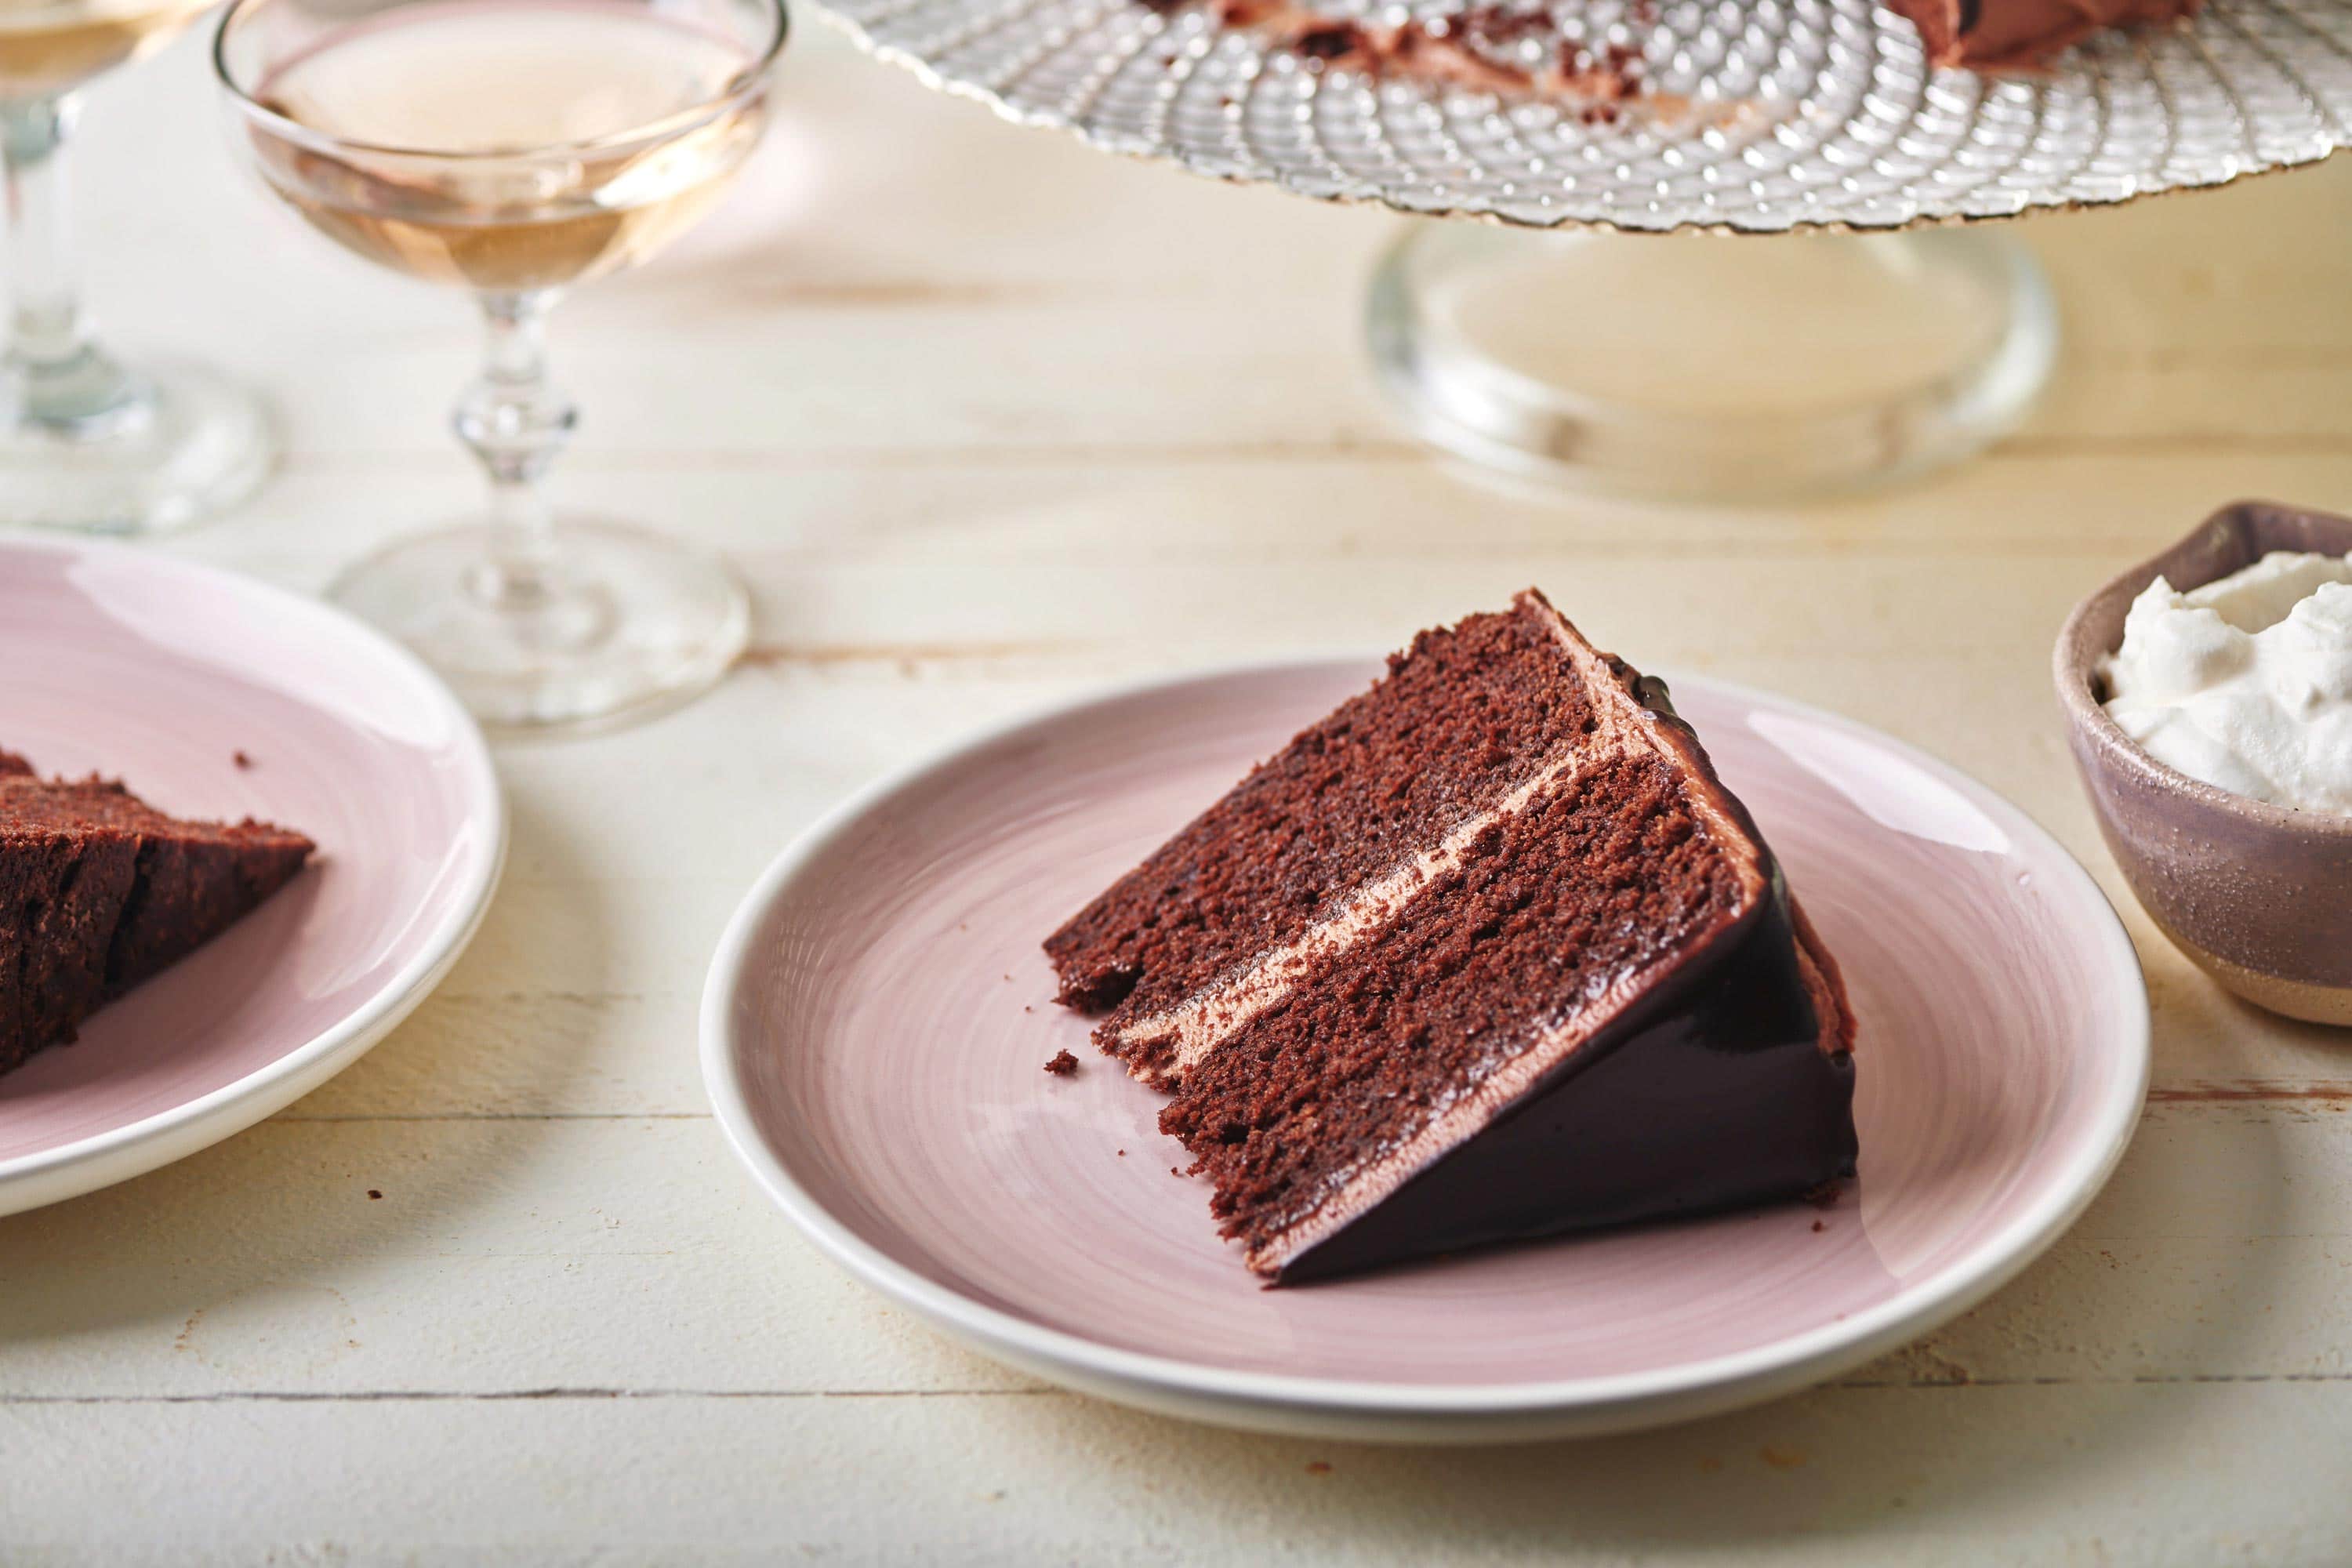
- Slice and serve: Cut the cake into slices, serve, and modestly accept all of the compliments that will be coming your way.
FAQ
There are a few contenders for the answer to this question. It might be because it’s sinfully delicious. It might be because it is the opposite of white and fluffy Angel’s Food Cake. Another theory is that it was so named during a time when foods that were dark or spicy or rich were deemed “devilish.” So, no definitive answer, but some fun theories.
You can go in a number of directions with the frosting, but I decided to pick a lane and press down on the pedal. So, Chocolate Buttercream. And lots of it. And then the optional topping — all in, baby.
If made in 8-inch pans, the cakes bake for at least 45 minutes because the layers are thick. Mine were done at 55 minutes. To test for doneness, insert a wooden skewer in the middle of the cake and pull it out. There should be only a crumb or two clinging to it but no undercooked batter. If you choose to bake these in 9-inch round pans, the baking time will be a bit shorter; start testing the cakes at 40 minutes.
Pro Cooking Tips
- If you would like to add the dripping sauce topping, make sure the top is very smooth. Warm the sauce until it is pourable but still thick, and pour it slowly in a circle over the top, working your way towards the edges. Use a spoon, knife, or offset spatula to help the topping drip over the sides in random spots. This will create gorgeous chocolatey drips.
- This recipe can be made in an 8- or 9-inch pan. if you use a 9-inch cake pan, start checking to see if the cake is done at 40 minutes.
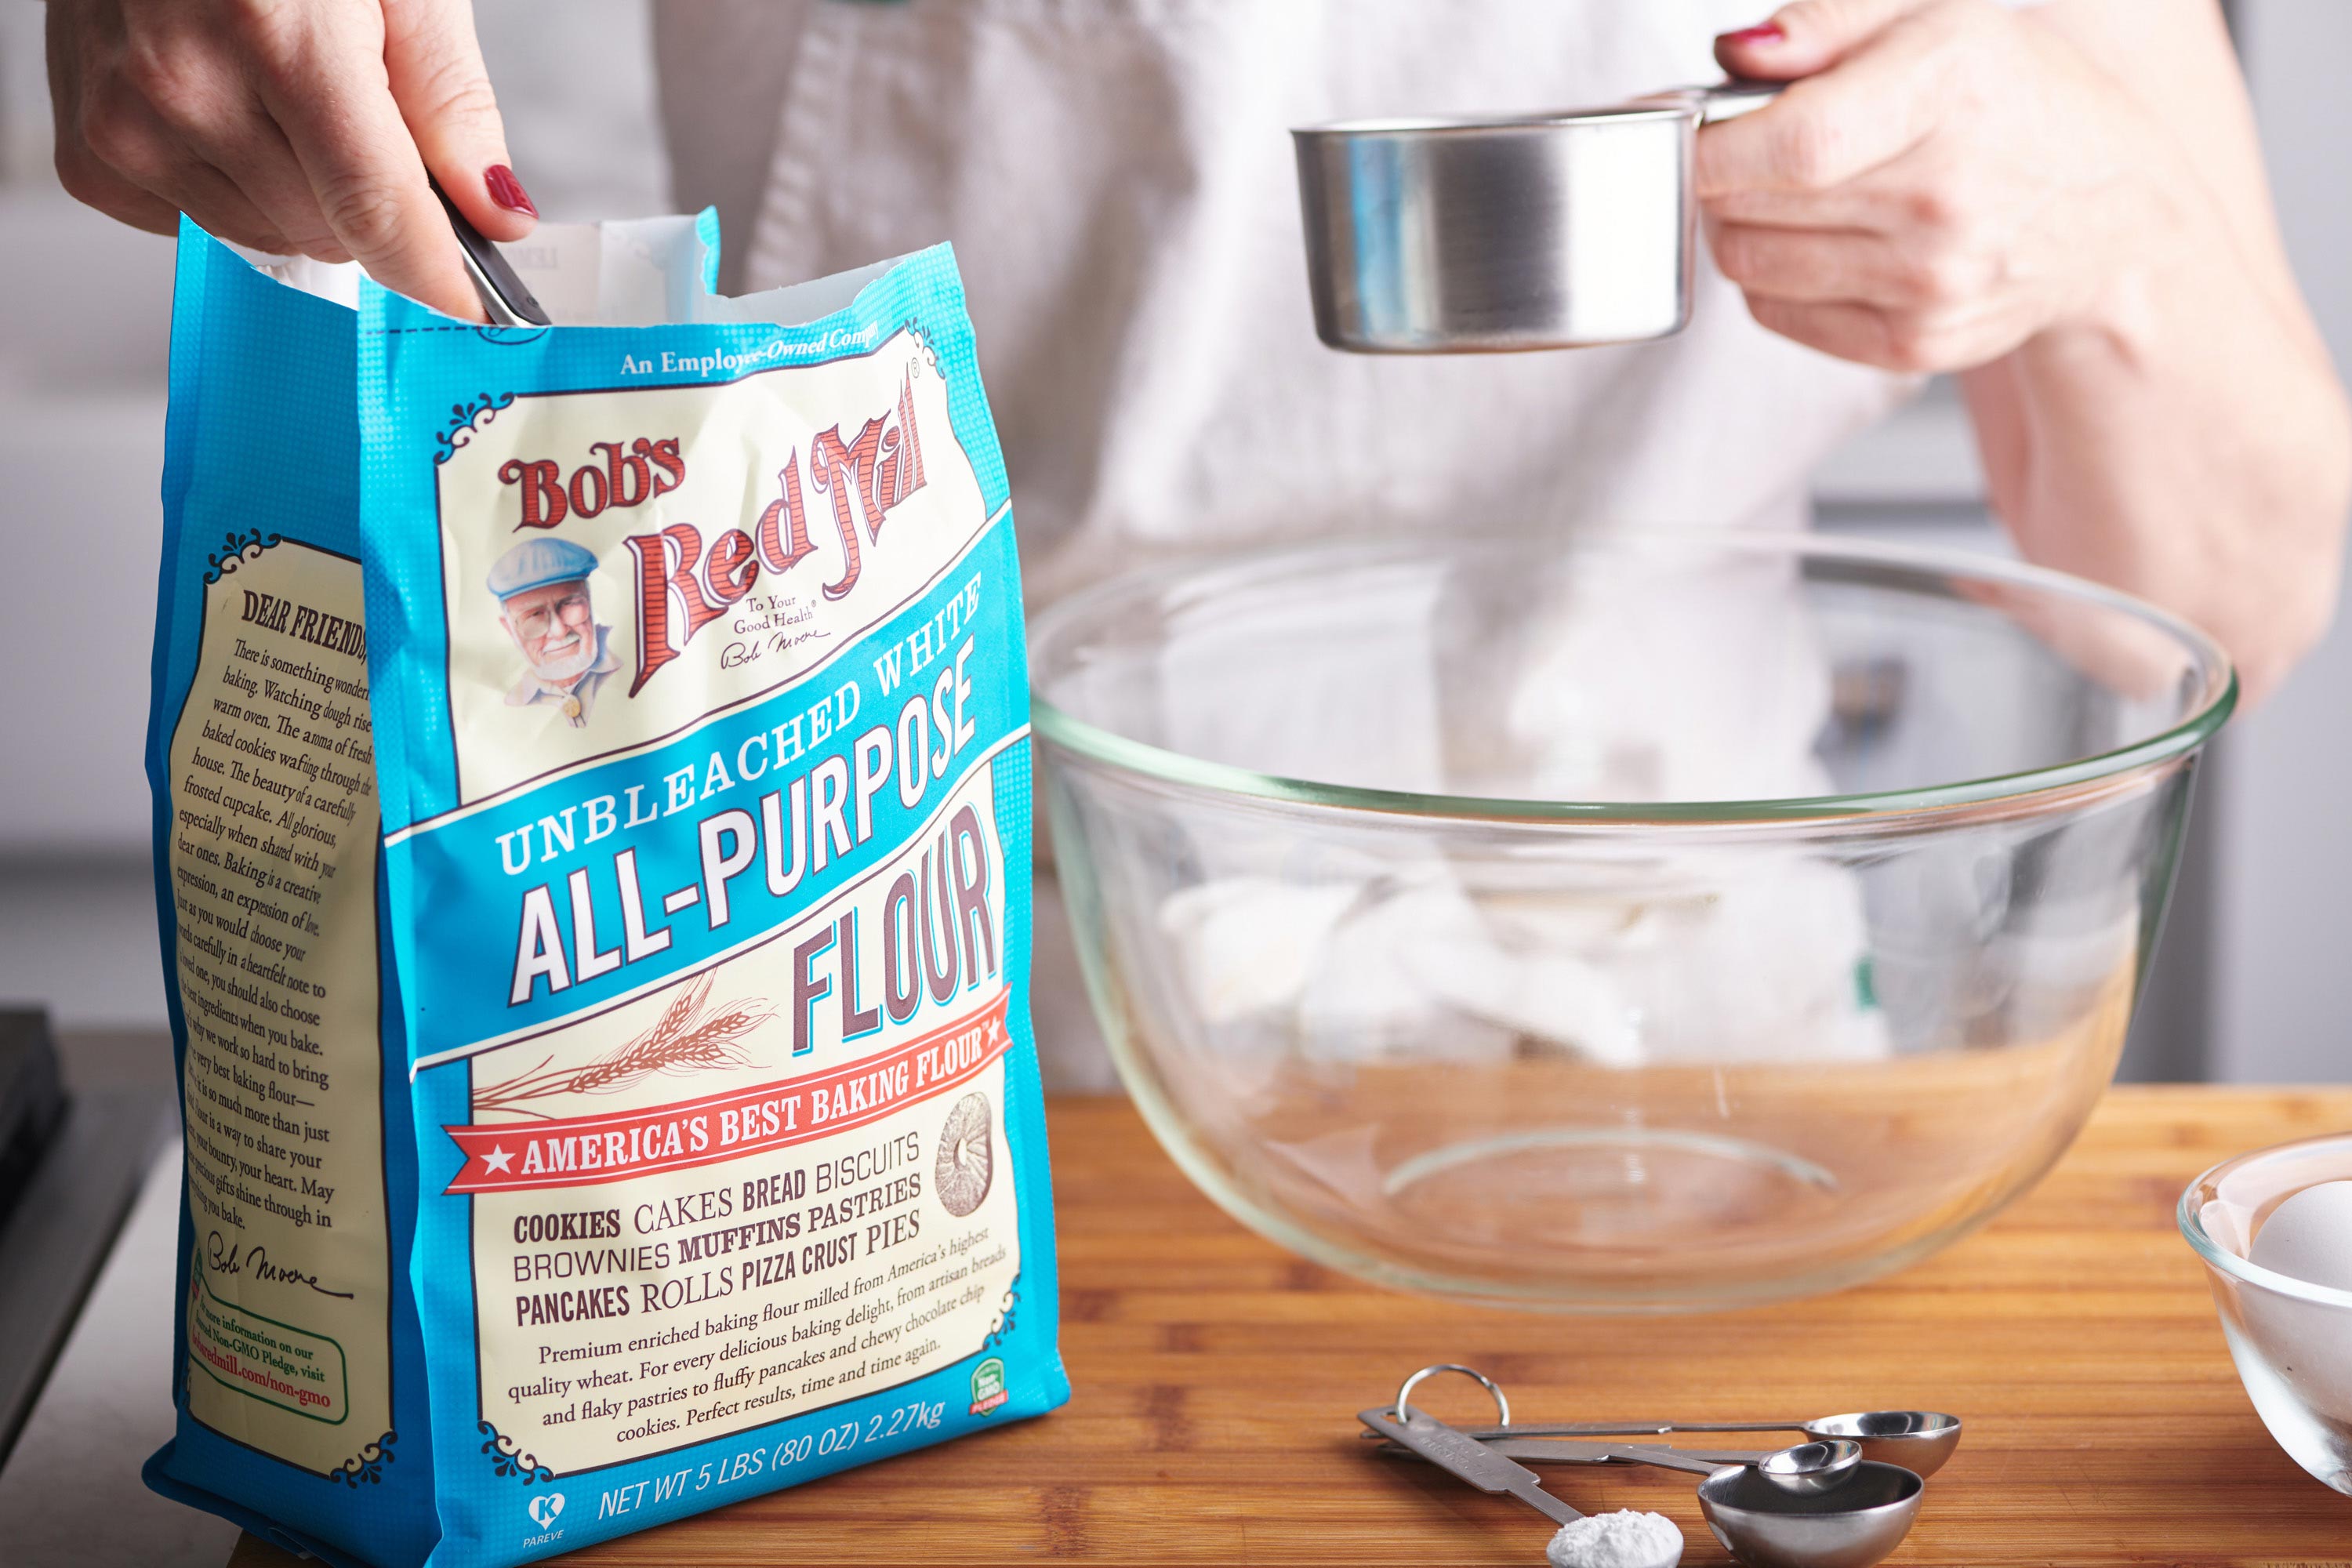
- Be sure to level off your dry ingredients when baking for consistency. Try scooping up your flour with a measuring cup and then scraping off the excess flour with a flat surface, such as a butter knife.
- If you stack the cakes upside down, the top level will be very flat, which will help if you want to add the drippy sauce topping.
What to Serve With Devil’s Food Cake
Storage
Covered, this chocolate cake will last for about 2 to 3 days at room temp. If you want to keep it covered in the fridge, it will last a couple more days.
If you want to make the cakes ahead and cool them completely, they can be tightly wrapped and frozen for up to 6 months.
More Fantastic Chocolate Recipes
- Chocolate Peanut Butter Ice Cream Pie
- Ebinger’s Blackout Cake
- One-Pot Mexican Hot Chocolate Brownies
- Easy Chocolate Mousse
- Fudgy Chocolate Cake
- Chocolate Banana Cake
Pin this now to find it later
Pin It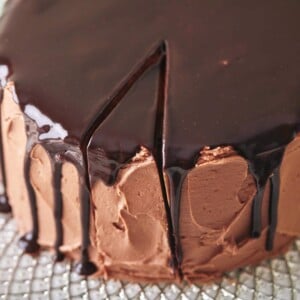
Devil’s Food Cake
Equipment
Ingredients
- 1 cup unsalted butter (at room temperature, plus more for the pans)
- 2 cups all-purpose flour (plus more for the pans OR Gluten Free 1-to-1 Baking Flour)
- ⅔ cup unsweetened cocoa powder
- ⅔ cup hot brewed coffee
- 1 teaspoon baking soda
- ½ teaspoon baking powder
- 1 teaspoon kosher salt
- 1 ¼ cups granulated sugar
- 1 cup packed dark brown sugar
- 1 tablespoon pure vanilla extract
- 3 large eggs (at room temperature)
- 1 cup sour cream
- 1 recipe Chocolate Buttercream
- ⅔ cup Chocolate Fudge or Mocha Sauce (approximately)
Instructions
- Preheat the oven to 350 F. Butter two 8-inch round baking pans, then place a round of parchment, cut to fit neatly inside, on the bottom of each pan, and butter the parchment. Add a couple of tablespoons of flour to one of the pans and tilt the pan so that the inside gets completely lightly coated with flour. Turn the remaining flour into the second pan and repeat. Turn the pans over and gently tap out all excess flour.
- In a small bowl, whisk together the cocoa powder and coffee. Set aside.
- In a medium bowl, combine the 2 cups flour, baking soda, baking powder, and salt.
- In a large bowl, place the butter and sugar. Beat with an electric mixer until light and fluffy, about 3 minutes. Add the eggs one at a time. Beat in the vanilla. Scape down the sides and add the coffee mixture. Beat until incorporated.
- Add half of the dry ingredients and blend until almost incorporated, then add the sour cream and beat until almost incorporated. Then, add the remaining dry ingredients and continue beating until everything is well blended. Scrape down the sides and beat for a few more seconds.
- Divide the mixture evenly between the two prepared pans and bake for 45 to 55 minutes (if you use a 9-inch cake pan, start checking at 40 minutes), until a wooden skewer inserted in the middle of the pan comes out pretty clean (no undercooked batter attached!)
- Cool the cakes in the pans on a wire rack for 10 to 15 minutes, then carefully turn them out and cool completely on wire racks.
- To assemble the cake, place one cake layer upside down on a round of cardboard or a flat plate. Using an offset spatula or a butter knife, frost the top of the with a generous layer of the Chocolate Buttercream. Place the second cake layer upside down on top of the bottom layer, and frost the top and the sides of the cake with a thin layer of the Chocolate Buttercream. Place the cake in the freezer for 15 minutes or in the refrigerator for 30 minutes to firm up the thin layer of frosting.
- Remove the cake from the fridge and frost the top and the sides with a generous layer of buttercream, making it as smooth or as swoopy as you like.
- If you would like to add the topping, make sure the top is very smooth. Warm the sauce until it is pourable but still thick, and pour it slowly in a circle over the top, working your way towards the edges. Use a spoon, knife, or offset spatula to help the topping drip over the sides in random spots, to create gorgeous chocolatey drips. Place the cake in the fridge for at least 15 minutes to firm up the sauce.
- Cut into slices, serve, and modestly accept all of the compliments that will be coming your way.
Notes
- If you would like to add the dripping sauce topping, make sure the top is very smooth. Warm the sauce until it is pourable but still thick, and pour it slowly in a circle over the top, working your way towards the edges. Use a spoon, knife, or offset spatula to help the topping drip over the sides in random spots. This will create gorgeous chocolatey drips.
- This recipe can be made in an 8- or 9-inch pan. if you use a 9-inch cake pan, start checking to see if the cake is done at 40 minutes.
- Be sure to level off your dry ingredients when baking for consistency. Try scooping up your flour with a measuring cup and then scraping off the excess flour with a flat surface such as a butter knife.
- If you stack the cakes upside down, the top level will be very flat, which will help if you want to add the drippy sauce topping.


Will this recipe work well for an oblong cake (9×13) or cupcakes? My son wants chocolate for his birthday cupcakes and I’m gluten free.
I haven’t tried but I would think yes, especially in cupcake form! LMK how it turns out!
I made this cake for my friends birthday, as it is her favourite type of cake. It was a total hit! Very easy to make. I used two 8″ round pans and it rose just past the tops of them but didn’t spill over. Great flavour, rich, and moist. The frosting was AMAZING. Will likely make again. Thanks!
This was purely amazing. I added the topping, and also added sea salt and chopped dark chocolate wafers over top. This will be my go to when bringing a cake to family get togethers!
love that!!! and love the dark chocolate wafers.