Pesto Crescent Rolls
on Dec 11, 2020, Updated Feb 18, 2025
This post may contain affiliate links. Please read our disclosure policy.
With a quick brush of pesto and a sprinkle of cheese, refrigerated crescent rolls become something extra special.

No matter what is on the table, the buffet, or the menu, a warm, buttery crescent roll is pretty hard to resist. And thanks to those ubiquitous tubes of refrigerated crescent roll dough, these little pesto croissants are so easy to make. I don’t care how sophisticated you are, there’s no way to pass up one of those flaky tender little breads when the basket passes under your nose. These are easier to make than pesto pinwheel crescent rolls, with less cutting and folding. Oh, and also think about Three Cheese and Prosciutto Stuffed Biscuits.
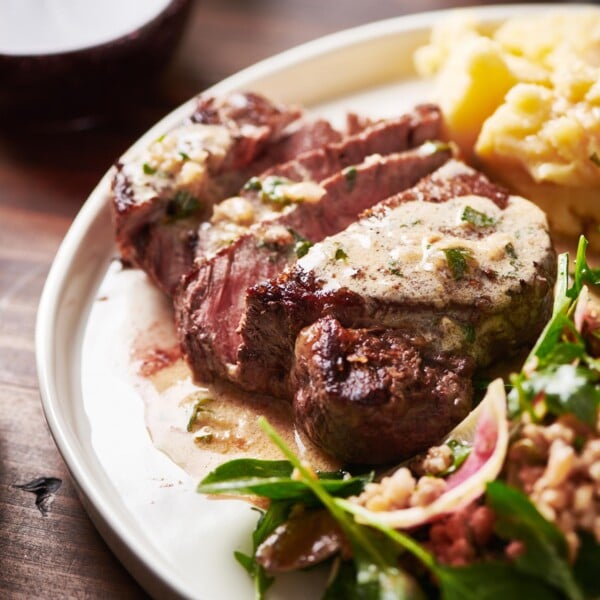
These cheesy, doughy, irresistible rolls are perfect for snacking, as a crowd favorite at a potluck, or served alongside dinner. Try Simple Lemon-Garlic Roasted Turkey Breast, Greek Turkey Meatloaf, or Slow Cooked Pork Roast.
By signing up, you agree to our Privacy Policy.
What's In This Post?

Ingredients
- Refrigerated crescent dough – You can find this in the refrigerator aisle at the supermarket.
- Pesto – You can use store-bought or homemade; read the note below for more.
- Pecorino Romano or Parmesan cheese – For a bit of cheesiness and a slight tang.
Store-bought vs. Homemade Pesto
You can use store-bought pesto (but remember to check for allergies since most pestos contain nuts of some sort) or make your own, which is downright simple. And if you make nut-free basil pesto, then you don’t have to worry about any potential allergy issues.
Variations
Try little tiny pieces of brie instead of the Parmesan cheese. You can also use a sun-dried tomato pesto (with whatever cheese you like) for a different flavor and color.
How to Make Pesto Crescent Rolls
- Prepare the rolls: Pop open a can of crescent rolls and separate the dough into triangles along the perforated lines.
- Brush on the pesto: Brush each triangle lightly with pesto, and sprinkle evenly with the Pecorino Romano or Parmesan cheese.
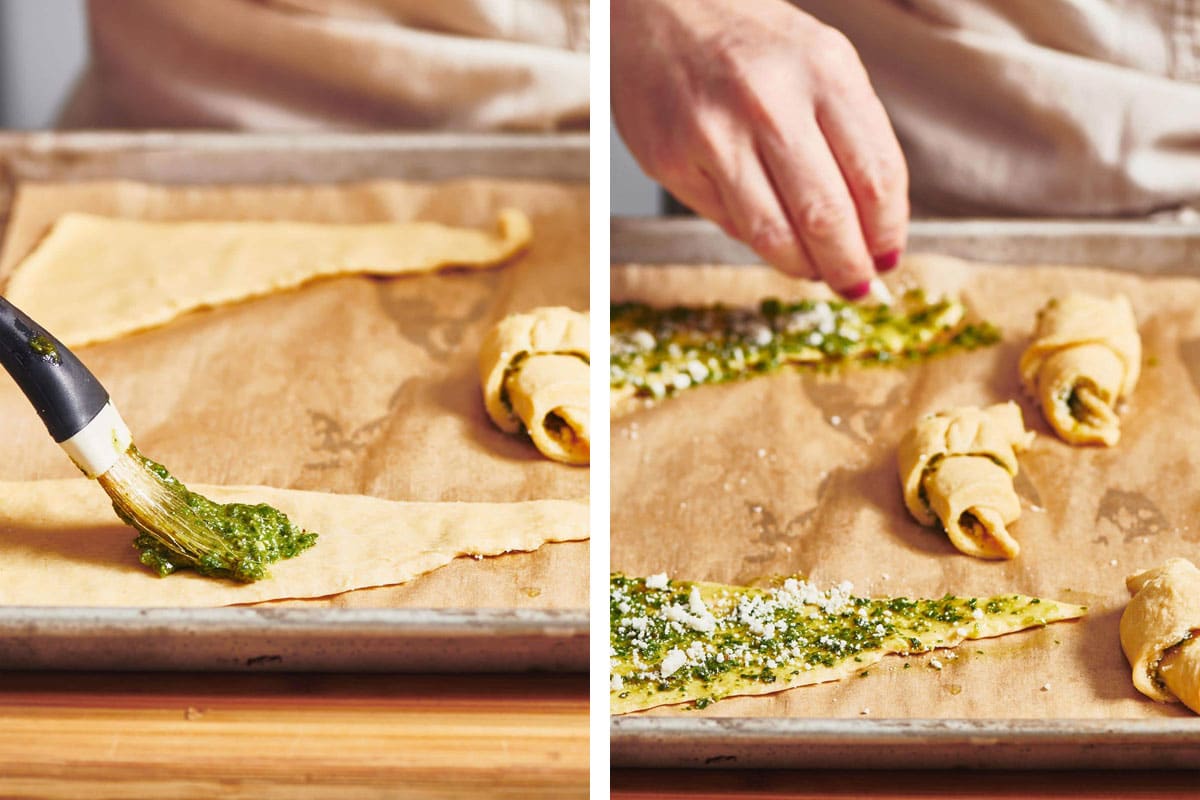
- Roll up: Roll them up from the short flat end of the triangle up to the tip.

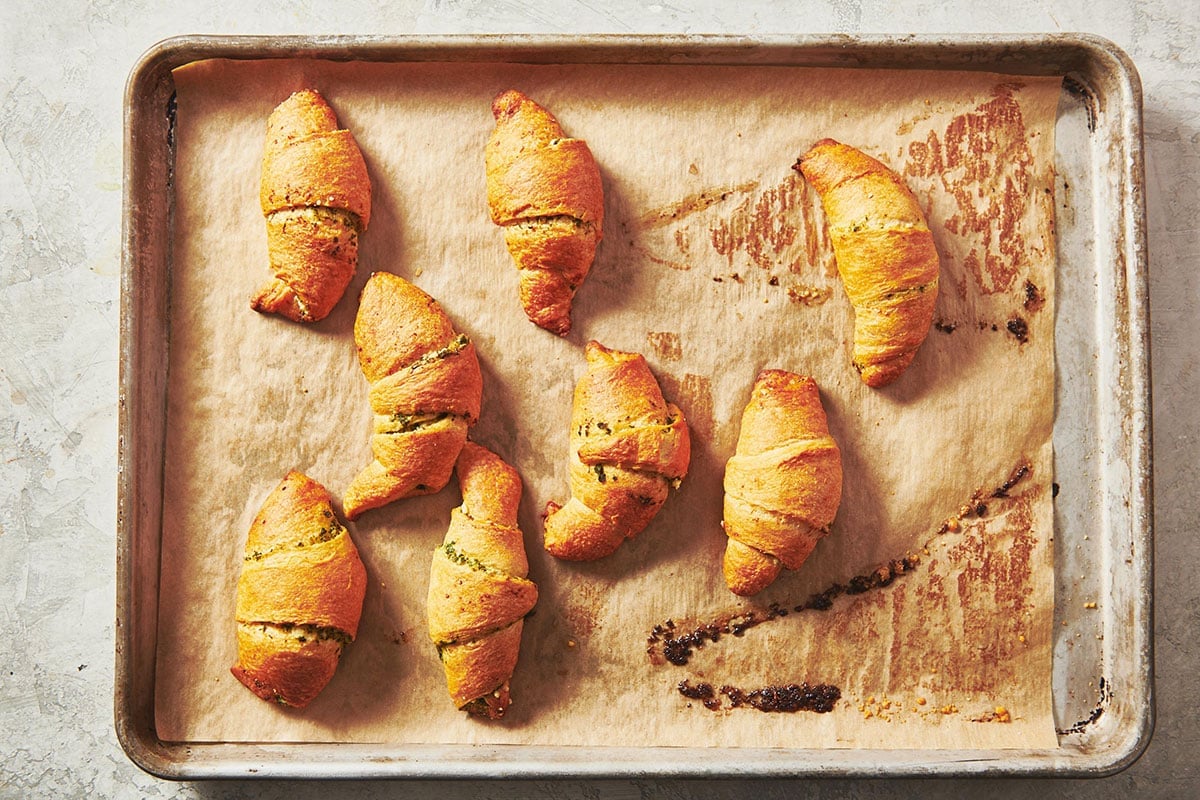
- Bake: Place them on a baking sheet and bake for 9 to 12 minutes at 375 degrees, until golden brown.
Storage
On the rare occasion that you don’t finish them all in one sitting, you can store these crescent rolls in an airtight container in the fridge for about 1 week. They will become less crispy but will crisp right back up if you heat them in the oven.
What to Serve With Pesto Crescent Rolls


Pesto Recipes
Pin this now to find it later
Pin It
Pesto Crescent Rolls
Ingredients
- 1 (8-ounce) can refrigerated crescent dough
- ¼ cup pesto (store-bought or homemade)
- ¼ cup finely grated Pecorino Romano or Parmesan cheese
Instructions
- Preheat the oven to 375 F.
- Pop open a can of crescent rolls and separate the dough into triangles along the perforated lines. Brush each triangle lightly with pesto, and sprinkle evenly with the Pecorino Romano or Parmesan cheese. Roll them up from the short flat end of the triangle up to the tip.
- Place them on a baking sheet and bake for 9 to 12 minutes, until golden brown. Serve warm.
Notes
- You can use store-bought pesto (but remember to check for allergies since most pestos contain nuts of some sort) or make your own, which is downright simple. And if you make your own nut-free pesto, then you don’t have to worry about any potential allergy issues.
- Leftover crescent rolls can be stored in an airtight container in the fridge for about 1 week. They will crisp right back up if you heat them in the oven.