How to Make a Perfect Roast Chicken
Updated Jan 11, 2026
This post may contain affiliate links. Please read our disclosure policy.
This is my go-to method for making a perfect roast chicken—juicy meat, crisp skin, and deeply savory flavor, every single time.
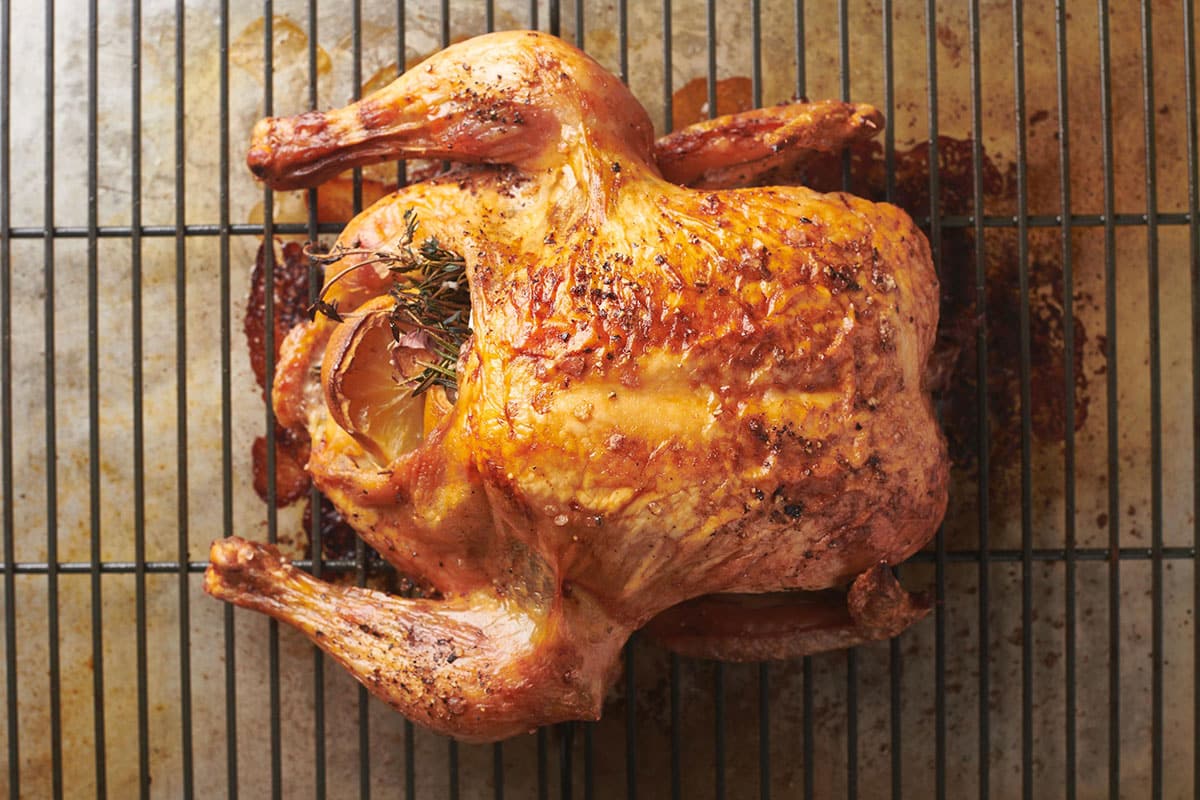
If there’s one recipe that every home cook should feel confident about, it’s a perfect roast chicken. It’s the kind of meal that looks impressive, smells incredible, and somehow makes dinner feel like an occasion—even when it’s not. This recipe is a reliable win every time.
The smell that fills your kitchen, the crackling skin, the juicy meat you can stop picking at as you carve it up. It’s deeply satisfying, and surprisingly simple. This recipe shows exactly how to make a perfect roast chicken: golden and crisp on the outside, tender and flavorful on the inside, with no trussing, no basting, and no stress.
This roast chicken tastes like it came from the best neighborhood bistro. Leftovers are perfect for meal prep (10 Things To Make With Leftover Chicken, anyone?) And see below for easy instructions for turning that carcass into a flavorful stock.
By signing up, you agree to our Privacy Policy.
Why You’ll Love This Roast Chicken Recipe
- Crispy skin, juicy meat: High-heat roasting locks in flavor and texture.
- Simple and foolproof: No trussing, no basting, very hands-off, with just a few classic ingredients.
- The smell!: Your whole house will smell amazing (and you’ll have bragging rights).
- Leftovers are fabulous: You can make another chicken dinner last in the week (especially if you roast two chickens and get LOTS of leftovers).
What's In This Post?
Kitchen Smarts
Roasting two chickens at once takes about 5 extra minutes of work, and if that isn’t a smart investment in cooking time, I don’t know what is. Make sure to roast the birds in a large roasting pan with a rack or a rimmed baking sheet with a wire cooling rack inserted to give the chickens ample room to cook and brown evenly.
Once you start roasting your own chickens, you’ll be celebrating that “aha” moment that comes with realizing how joyful this simple pleasure can be. Leftovers can be used in recipes all week long, from chicken salad to chicken soup to chicken casseroles.
Seasoning a Whole Chicken for Roasting
You can season the chicken in any number of ways. There’s never anything wrong with just salt and pepper, but roast chickens take to all kinds of flavorings from Mediterranean to Asian to Indian to Middle Eastern, you name it. It’s a great way to explore some of those condiments or spices that need to reach their full potential in your kitchen.
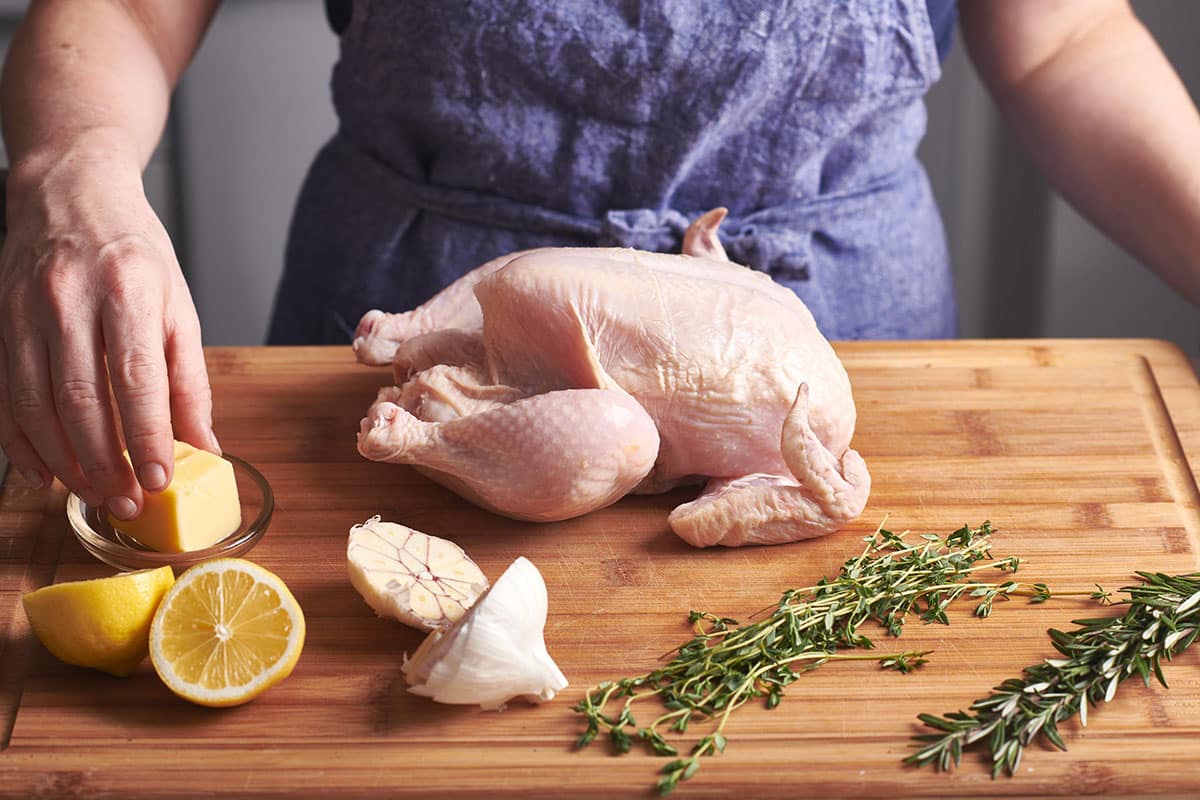
I like to stuff fresh herbs into the chicken’s cavity — such as rosemary and thyme — along with a cut lemon and a head of garlic or a halved onion. Super classic flavors.
Variations
Also, try adding one of the following to the softened butter and skip the rosemary and thyme:
- Italian herb blend
- Cajun or Creole seasoning
- Your favorite spice blend or rub
- Poultry seasoning
How to Perfectly Roast a Chicken Step-by-Step
1. Preheat the Oven and Set Up A Rack
Some cooks swear by higher temperatures, while others find that lower and slower gets them the chicken they want. I like to roast chicken at 400 to 425 F, which is also ideal if you are cooking additional vegetables along with the chicken.
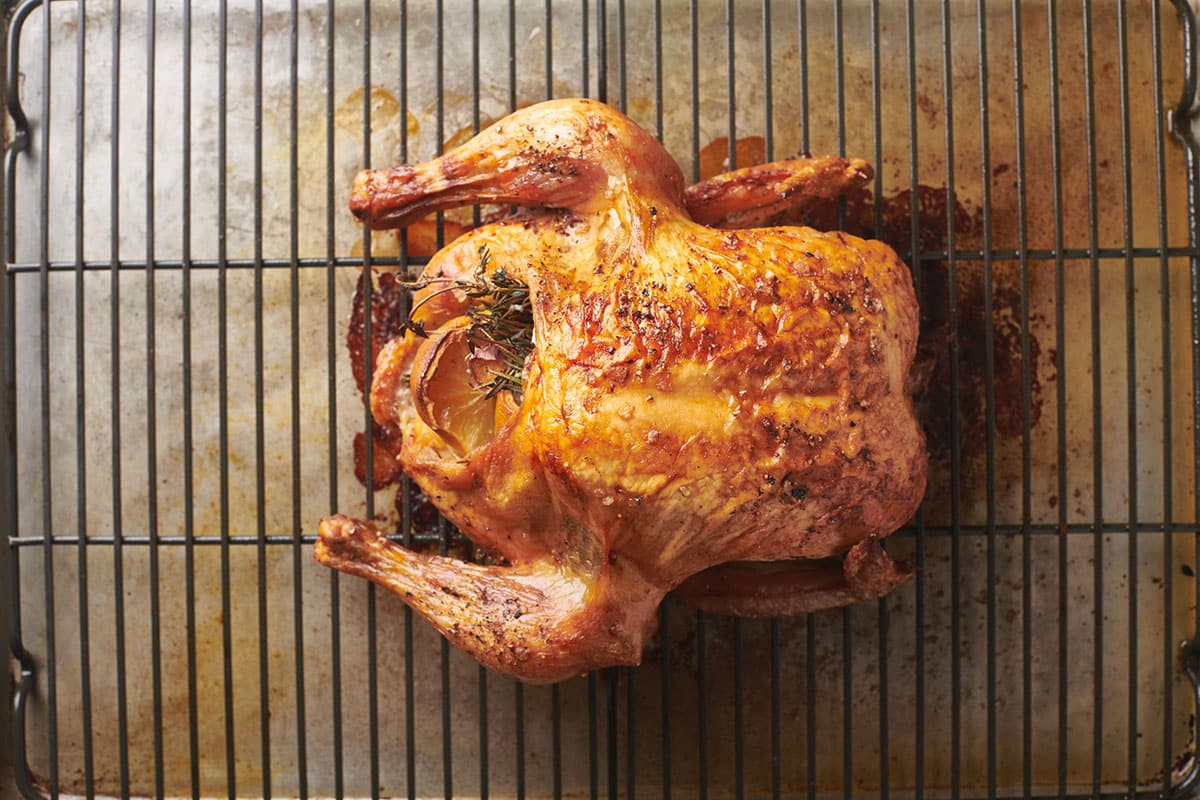
Place a wire rack in a shallow roasting pan or rimmed baking sheet. Cooking the chicken on a wire rack allows air to circulate under the chicken, and the skin on the bottom will become a bit crispier than if you cooked it directly on the pan. This is optional, however — a chicken roasted directly on the pan will also be wonderful. A cast-iron skillet is also a great vehicle for roasting chicken.
2. Butter the Skin
Make sure to pat the chicken dry before seasoning, which will result in a crispy skin. Blot the skin well with paper towels. Also, have the chicken at room temperature for more even cooking.
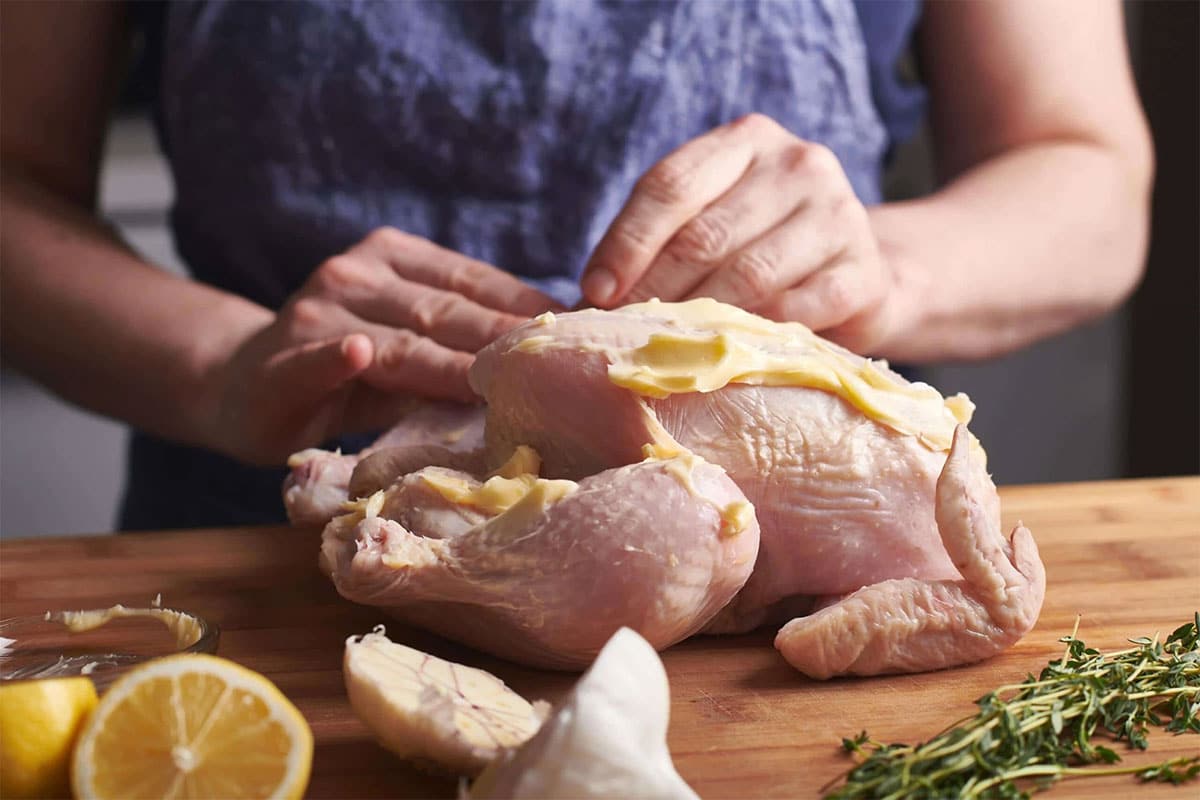
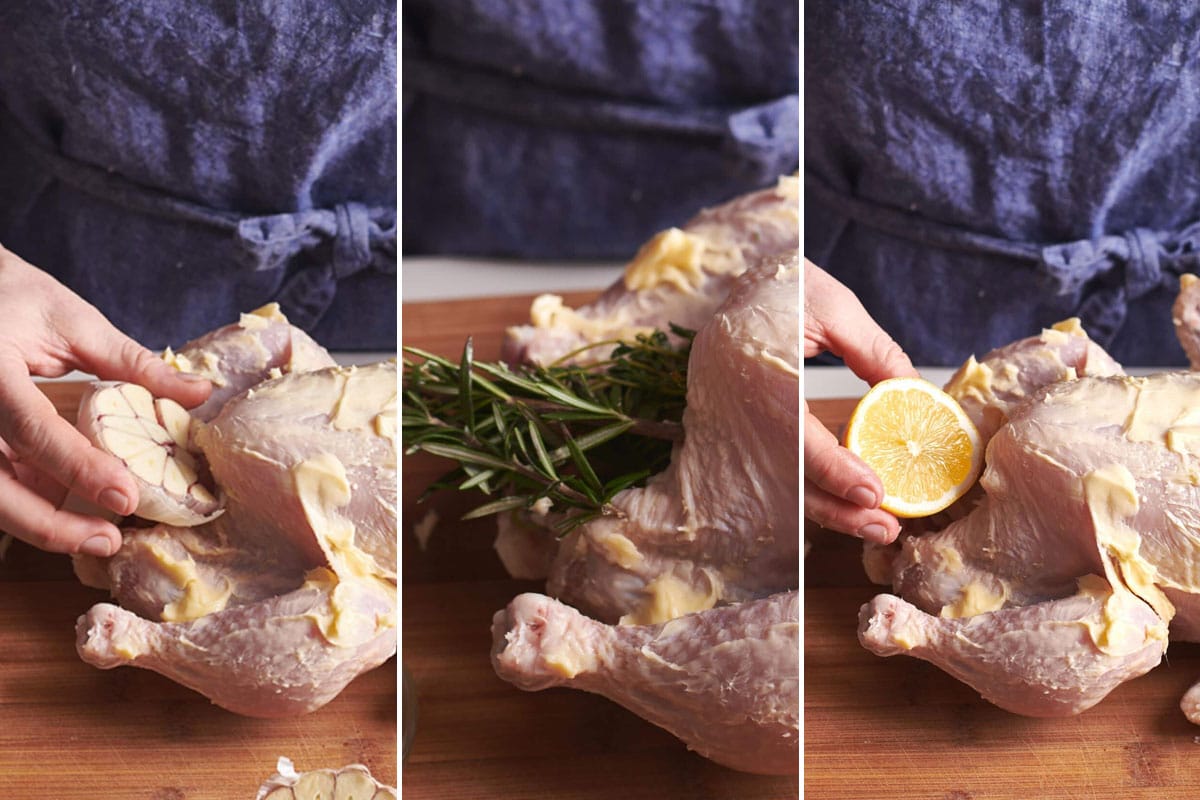
Smearing some soft butter on its own or combined with herbs and other seasonings under the skin helps keep the breast meat moist and juicy. Gently lift up the skin over the breast and use your hand to smear some butter underneath, trying not to tear the skin.
Rub the chicken all over with softened butter (olive oil is also a fine thought), which will give the skin additional flavor.
3. Season the Chicken
Be generous with the salt and pepper! Some cooks like to season the chicken and then leave it uncovered in the fridge for a day or two to allow the salt to sort of dry-brine the chicken (just like brining a turkey). It’s a nice way to create extra juicy meat, but it’s not at all necessary. Salt and pepper are the basics, and other seasonings are welcome.
4. Stuff the Chicken if Desired
In this recipe, halved garlic and lemons, and sprigs of herbs, such as classic thyme and rosemary, are placed into the cavity of the chicken, which flavors the juicy meat. Apples or oranges and onions are other options.
Do I Need to Truss or Baste the Chicken? Highly Optional!

Some cooks like to truss their chickens before roasting, while others think it is unnecessary. Trussing means tying up the legs with kitchen twine close to the bird’s body so that it keeps a neater, more compact shape.
Sometimes, recipes will instruct you to tuck the wings behind the chicken (which I think is sort of awkward and hard). The intention is that the light and dark meat will cook more evenly. I kind of think all of it is overrated, partly because it’s just one extra step. So usually, no tucking or trussing for me. The wings do end up fairly crispy, but I like that, and if you use them for stock, they will be nicely browned and add rich flavor to the liquid.
Basting is highly optional — some people feel like it makes for a crisper, more flavorful skin, while others (Like Thomas Keller! Like Ina Garten!) feel like it’s not necessary. That’s the camp I like best.
5. Add Vegetables to the Roasting Pan (Optional)
Other vegetables may be added to the pan to cook alongside the chicken. Make sure they are the right size and texture so they will cook at the same time as the chicken, like roasted potatoes. If they need less time (like broccoli florets), you might add them partway through the cooking process. Scatter any vegetables you’re using around the chicken.
7. Roast the Chicken
If you are not roasting any vegetables with the chicken, it’s a good idea to add about 1/2 cup of water to the pan to prevent the drippings from burning. Place the chicken on the rack breast side up, slide the pan into the oven, and roast it uncovered for about 60 to 70 minutes.
8. Test the Roast Chicken for Doneness
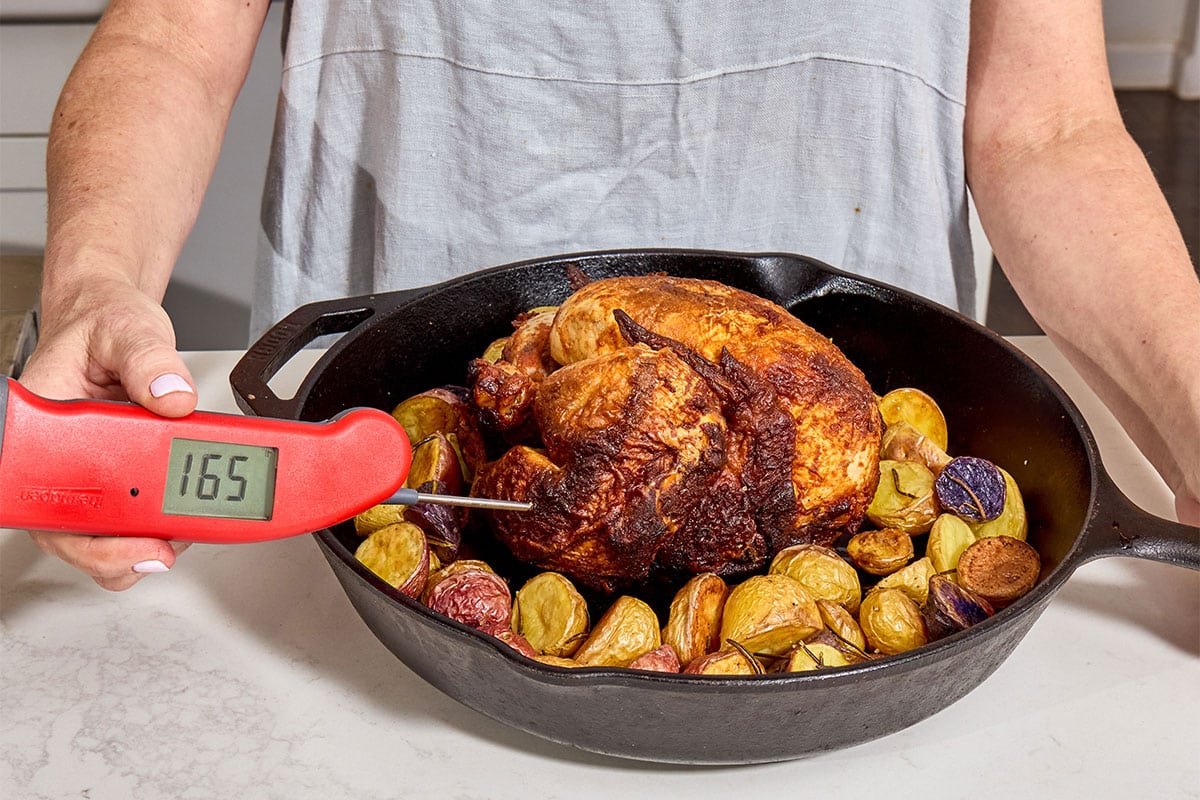
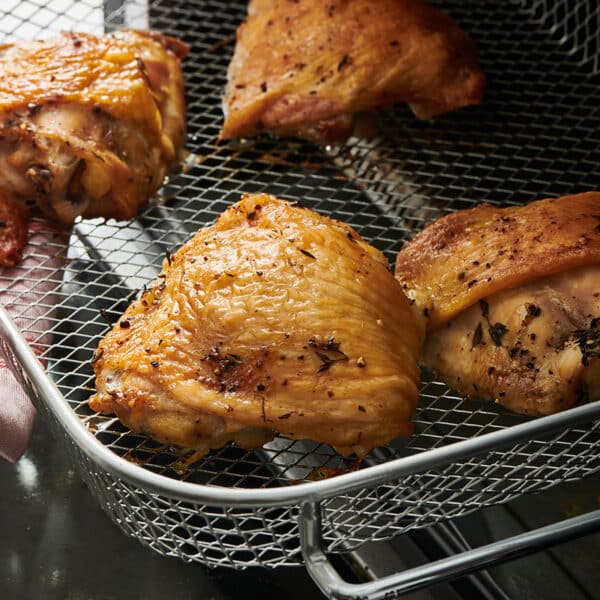
The skin should be browned and crispy. An instant-read thermometer inserted into the thickest part of the thigh (but not touching the bone) should register 165 F. When you make a small cut in the thigh, the juices should run clear, not pink.
10. Let the Chicken Rest
Roast chicken (and really all meat, especially large pieces of meat) needs to sit for at least 15 minutes after being removed from the oven for the juices to regroup into the meat before you slice it. Otherwise, you risk losing all of those delicious juices on your cutting board. Make sure to tilt the chicken before transferring it so that any juices that accumulate in the cavity of the bird go into the pan.
Make a “Jus” (Sauce) – Optional!!!
While the chicken is resting, you can make a jus, which is a very simple pan sauce. Jus is French for “juice,” and it refers to the juices that emanate from the chicken as it roasts.
- You can simply pour all of the juices that accumulated in the pan into a heat-proof measuring cup. Wait for the fat to rise to the top, then skim that off and drizzle the remaining juices over the chicken, though there probably won’t be much.
- Or, once the fat has been skimmed off, place the pan you roasted the bird in on a burner (or two) set to medium-high heat. Return the skimmed juices to the pan, add 1/2 to 1 cup of chicken broth or stock, and bring to a simmer, stirring to loosen all of the browned bits from the pan. Strain if desired.
- Taste and see if it needs salt or pepper. You can also add some chopped fresh herbs if you like, such as thyme. Also, think about adding some finely grated lemon zest. Pour the sauce into a small pitcher or cup and drizzle over the meat.
How to Carve a Whole Chicken
When carving a roasted chicken, it’s best to use a cutting board or serving board with a moat to catch the juices that will emerge as you cut into the chicken.
- Carve the dark meat and wings. Start by cutting off the drumsticks. Then, cut the thighs from the chicken. Cut the wings from the bird.
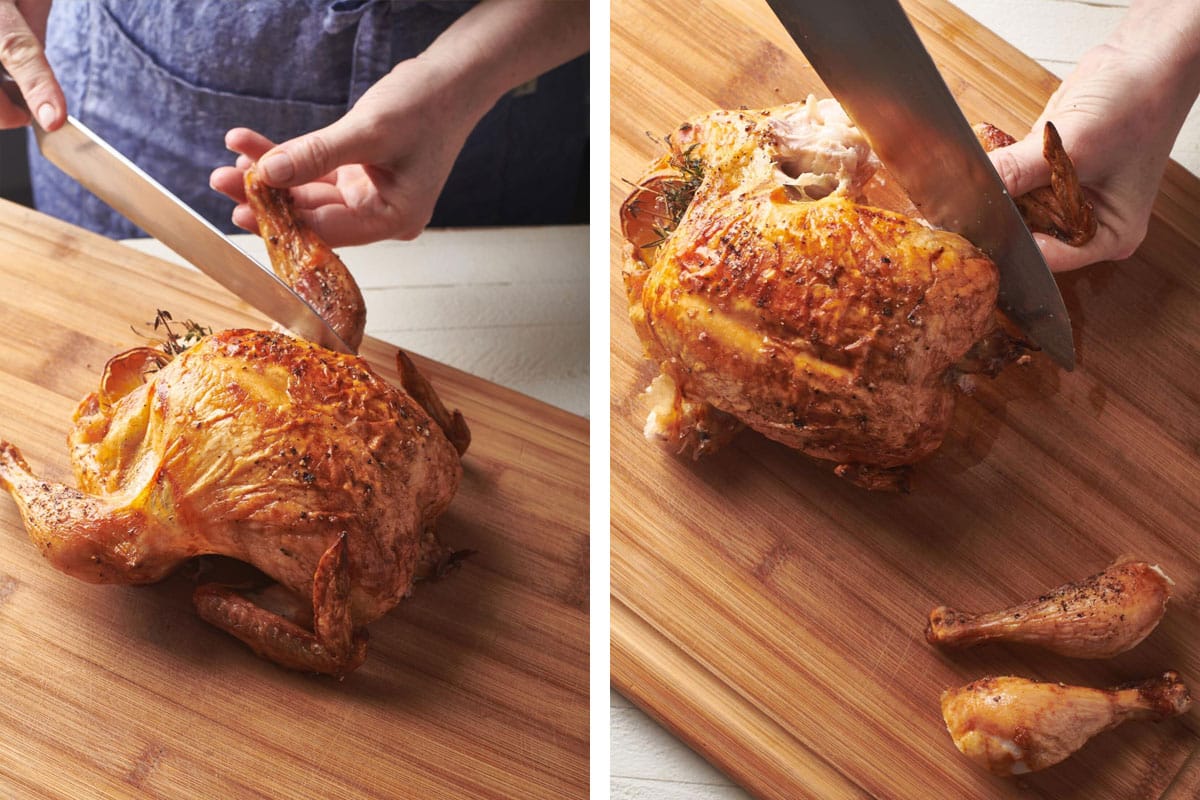
- Carve the breast. You can then either cut the breast meat into slices directly from the chicken or remove the breast meat as a whole piece and then slice it on the cutting board. See How to Carve a Turkey for more tips (chickens are smaller than turkeys, so easier to carve!).
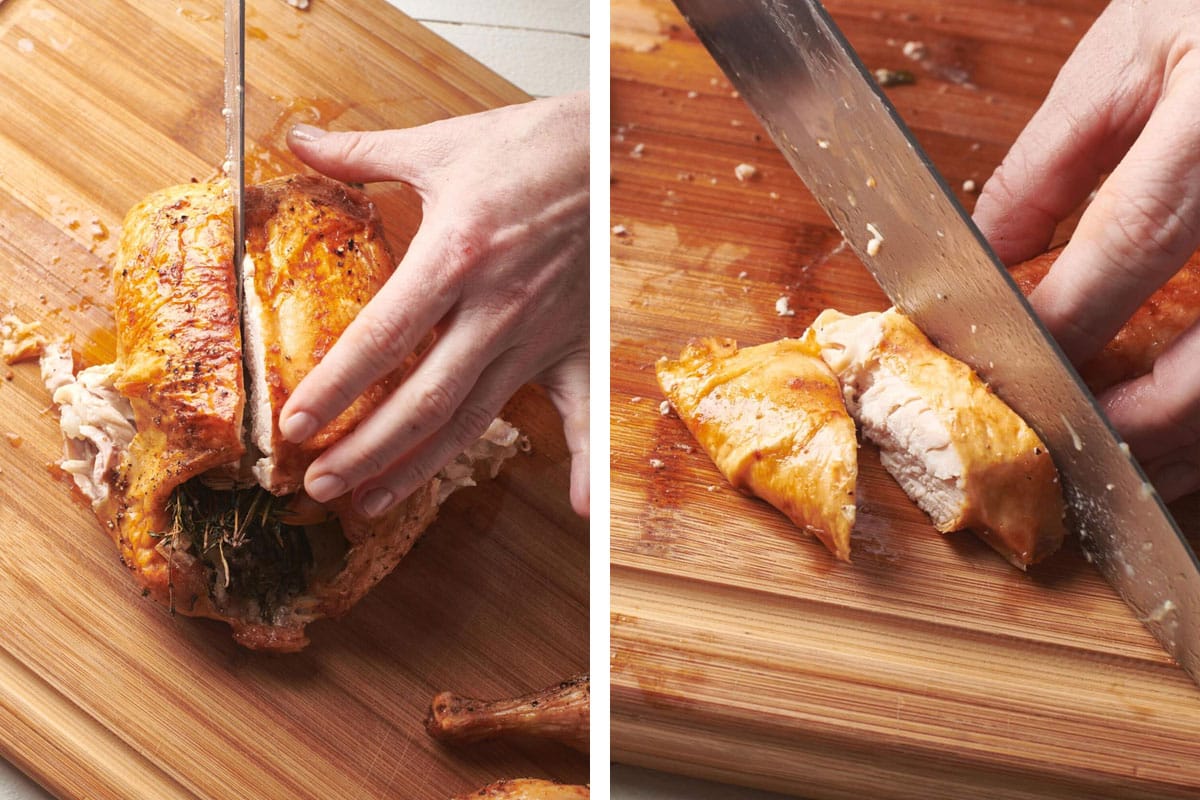
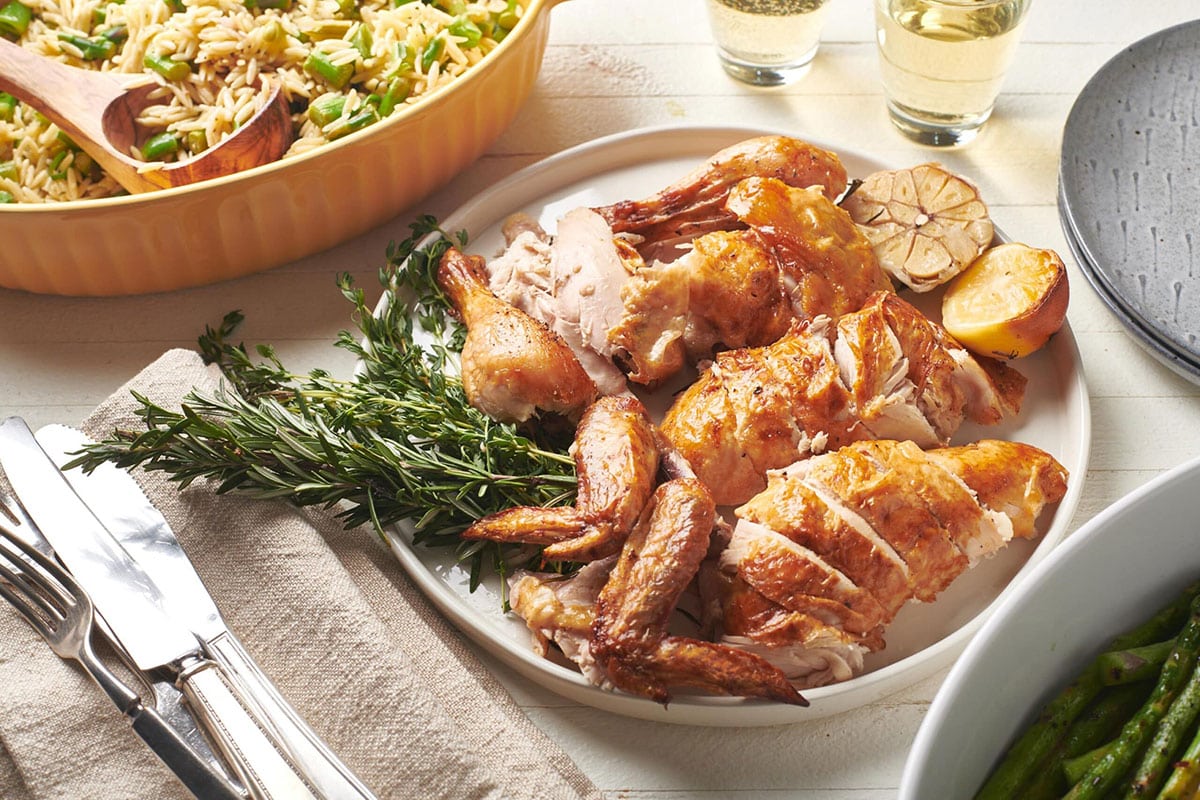
- Arrange and serve. If you roasted other vegetables along with the chicken, arrange them with the chicken on a serving platter and serve with the jus, if desired. A sprig or two of fresh herbs on the platter really makes a simple roast chicken look very special.
Leftovers and Storage
Leftover roast chicken can be kept in an airtight container in the fridge for up to 6 days. You can remove the meat from the bones before storing, or store whole pieces, and even a partially carved bird. You can also freeze roasted chicken, wrapped tightly in plastic wrap, for up to 6 months.
Making Stock From a Roast Chicken
- Save absolutely everything for stock! Place the bones, any bits and pieces, and extra skin from the chicken into a large pot. Add cold water to cover, and bring to a simmer. Simmer for about 1 hour, and you will have a light broth.
- Try using canned or boxed chicken broth instead of water to simmer the bones — use less-sodium broth if you’re doing this. It will result in a richer stock. I recommend using more than one chicken carcass, which will also give you a richer broth.
- Add some vegetables, such as onions, carrots, and celery, and perhaps some fresh herbs to the pot for a more flavorful broth.
- Strain out the solids, cool, and use as desired, or refrigerate or freeze the stock for future use. See How to Make Turkey Stock for more stock-making tips.
What to Serve With Roast Chicken
Juicy roast chicken is such a perfect and simple main course, and you can go any which way with the sides. Classic sides are great, but you can also pair a simple roast chicken with more adventurous choices.
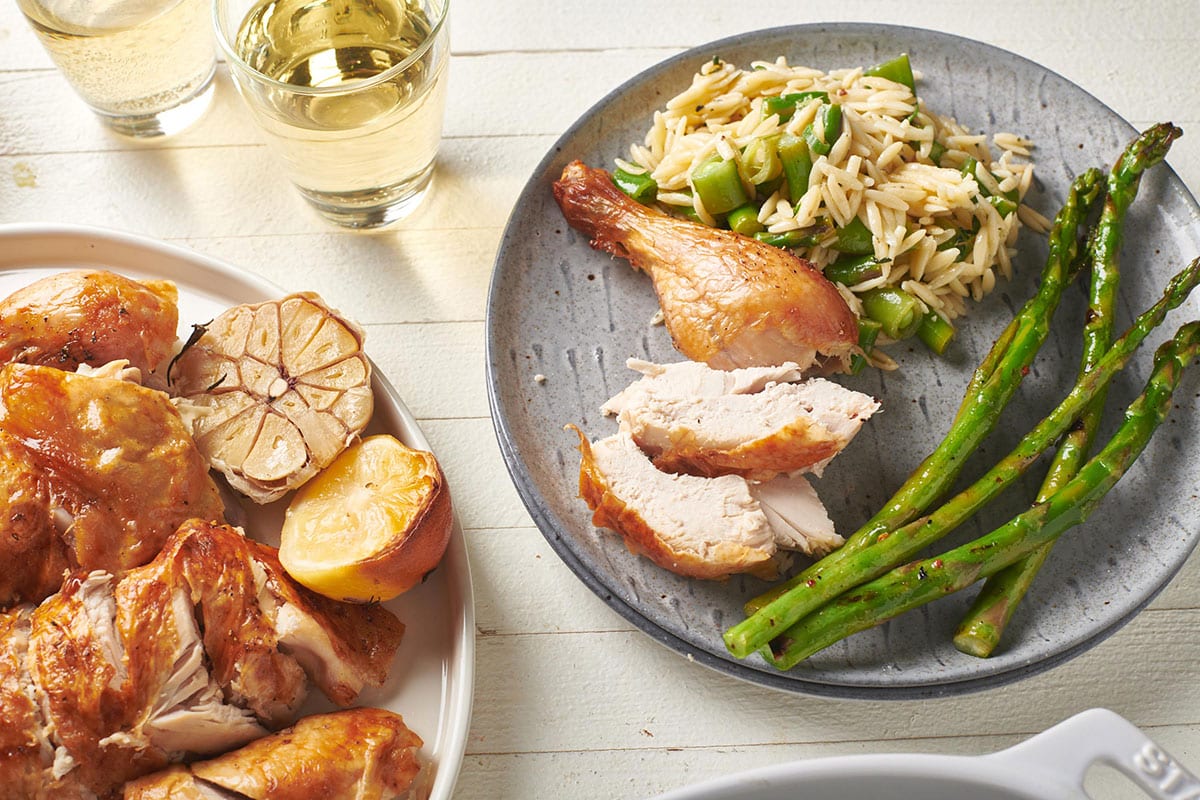
Simpler, more traditional sides include Parmesan Roasted Potatoes, Roasted Asparagus, Cheesy Baked Brussels Sprouts, Simply Sautéed Green Beans, or Cauliflower au Gratin. Or get a little off the beaten path with…
Pin this now to find it later
Pin It
How to Roast a Chicken
Equipment
Ingredients
- 1 whole chicken (3 1/2 to 4 pounds)
- 3 tablespoons unsalted butter (softened)
- Kosher salt and freshly ground black pepper (to taste)
- 1 lemon (halved)
- 1 head garlic (halved crosswise)
- Fresh thyme (several sprigs)
- Fesh rosemary (several sprigs)
Instructions
- Preheat the oven to 425 F.
- Pat the chicken completely dry with paper towels. Rub the chicken all over with the softened butter. Season inside and out with salt and pepper.
- Stuff the lemon, garlic, thyme, and rosemary into the cavity of the chicken. Place the chicken on a rack in a roasting pan, or use a wire rack placed into a rimmed baking sheet. If you don’t have a rack, just place the chicken in a roasting or baking pan or on a rimmed baking sheet. Roast for 60 to 70 minutes until the skin is browned and crispy, an internal thermometer registers 165 F when inserted into the thickest part of the thigh (but not touching the bone), and the juices run clear, not pink.
- Remove the chicken from the oven, tilt it so any juices captured inside the bird run into the pan, and let it rest on a cutting board for 10 to 15 minutes.
- Cut up the chicken. Start by cutting off the drumsticks, then cut the thighs from the chicken. Remove the wings. Then carve the breast: You can then either cut the breast meat into slices directly from the chicken or remove the breast meat as a whole piece and then slice it on the cutting board (see above for step-by-step instructions and photos for carving a roast chicken).
- Arrange the pieces on a platter and serve.
Notes
Let the chicken rest for 10 minutes. Pull the legs away from the body and cut through the joints to remove them. Separate thighs and drumsticks if desired. Remove the wings, then slice the breast meat off the bone and cut crosswise. Spoon any juices over the chicken and serve. Use Bones to Make Chicken Stock: Save absolutely everything from the roast chicken for stock! Place the bones, any bits and pieces, and extra skin from the chicken into a large pot. Add cold water to cover, and bring to a simmer. Simmer for about 1 hour, and you will have a light broth. More than one chicken carcass (recommended) will give you a richer broth, as will the option of using canned or boxed chicken broth instead of water to simmer the bones — use less-sodium broth if you’re doing this. Tip: Use the turkey stock recipe as a template to create a homemade chicken stock.

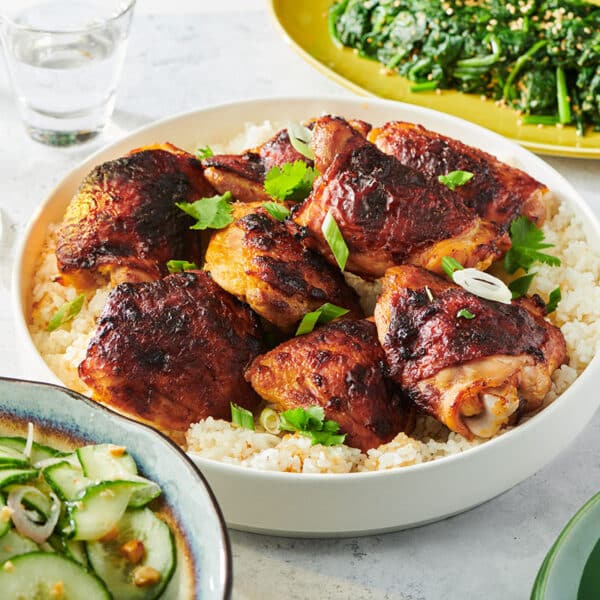


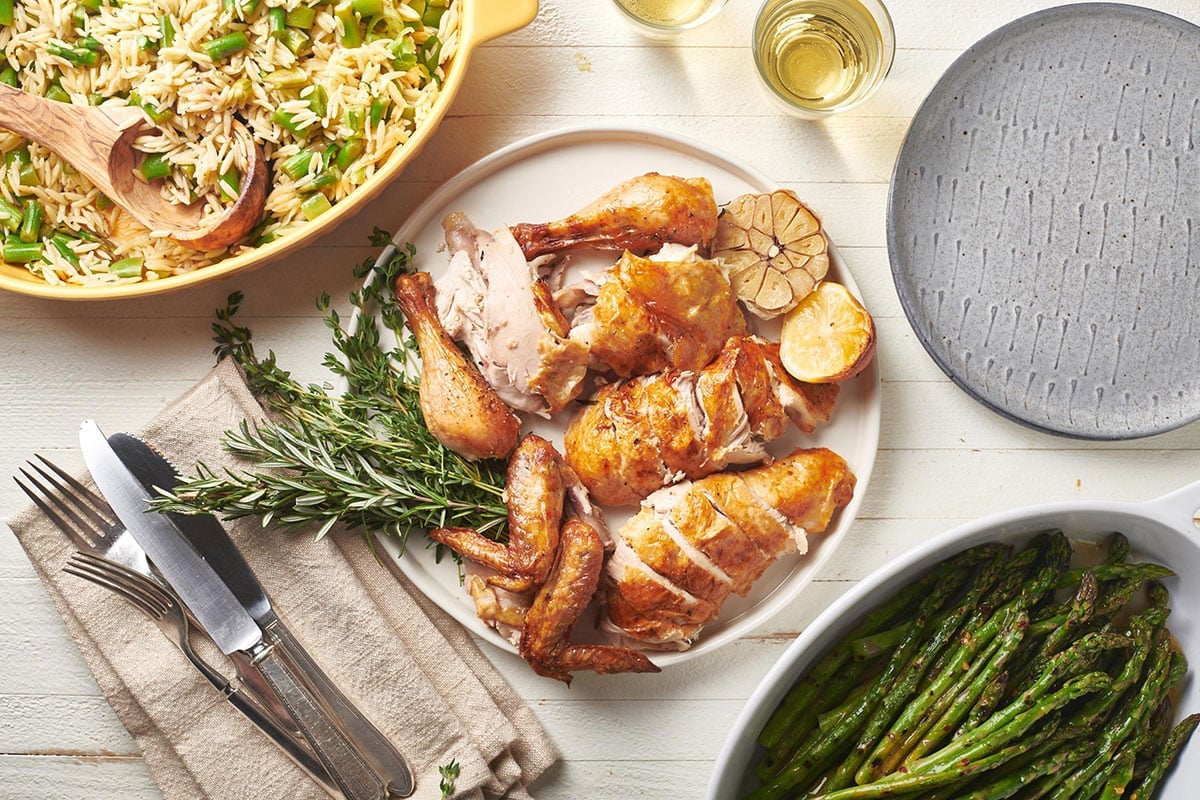
Great recipe for roasted chicken ,, you show a dish with chicken pieces and asparagus but it also includes what looks like a rice pilaf with cut up green beans ,, I would like to know what that side was , thank you
BD
Hi thre! That is the spring vegetable orzo salad! https://themom100.com/recipe/vegetarian-spring-orzo-salad/
Made it with Morrocan seasoning – delicious! Super simple; will make again
I have made this at least a dozen times, and it comes out perfect each time! Thank you for this recipe!
The whole family loved this recipe
This recipe was juicy and tender and delicious and I can’t wait to make it again next Friday night. Just like Ina.
This roast chicken recipe was so good! My whole family loved it so much that we didn’t have any leftovers.
You are right. Buying a roast chicken from the grocery store is only slightly more expensive than a raw one and they are fabulous.
Mulled cider is something my wife loves and I will pass along your recipe to her.
Thanks Katie
Not if you don’t like dried out over cooked chicken. In my area, rotisserie chickens run anywhere from $6.99 to $11.99 and it’s like playing Russian roulette with dinner. Sometimes the only way to get good stuff is to make it yourself.
I used it last time I roasted my chicken, it was so good I put few pictures on Fb, & now Im doing a 2nd Roasted Chicken using your recipe again. Thanks for sharing it!
Simple. Looks good. Easy to follow. Thank you!
Loved this post… great commentary and recipe!
Very delicious