Make-Ahead Turkey Gravy
on Oct 18, 2021, Updated Jan 18, 2025
This post may contain affiliate links. Please read our disclosure policy.
If you start your gravy the day before, it makes the gravy-making process much faster and the results even richer.
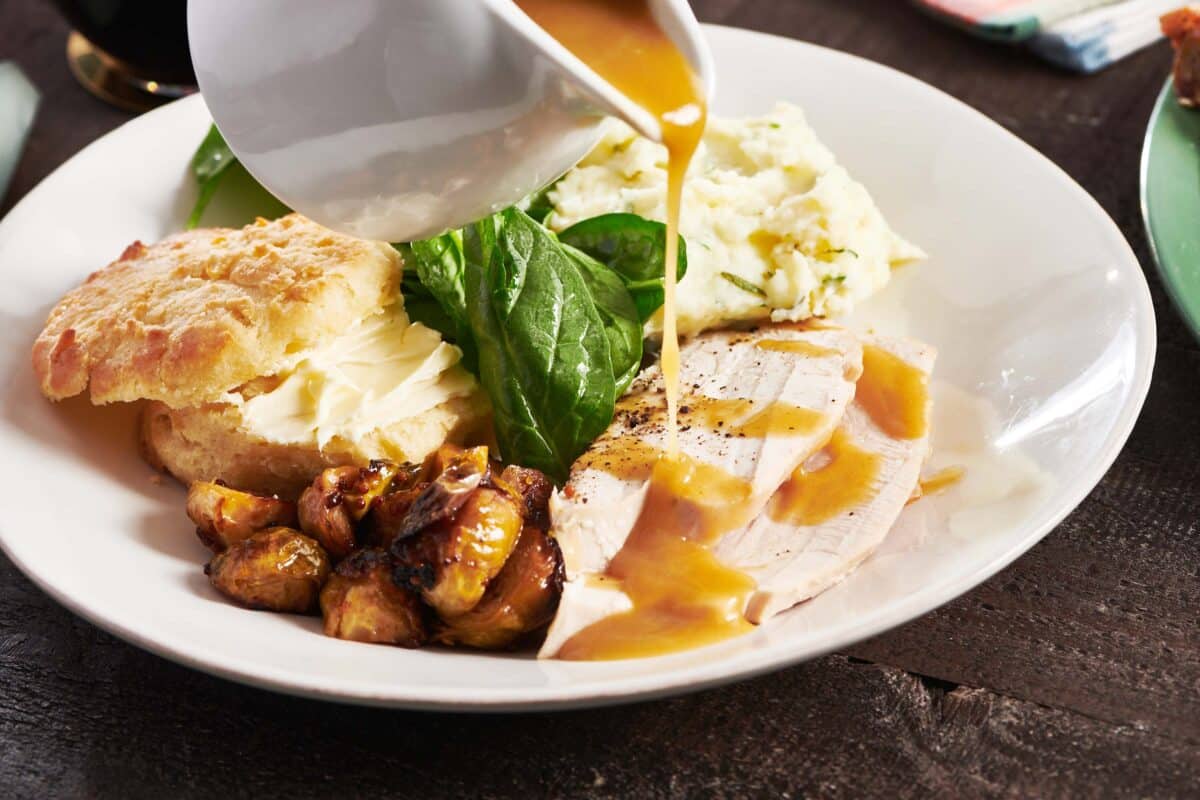
Getting a head on your Thanksgiving gravy is so smart, and also incredibly easy. Making turkey gravy from scratch at the very last minute is a hard ask of many Thanksgiving cooks. There are SO many things to be done at the last minute. If you don’t have a lot of helping hands available, the gravy might get overlooked or just plain canceled. And what a shame that would be — it’s hard to get as excited about naked slices of turkey and mounds of mashed potatoes looking for some adornment.
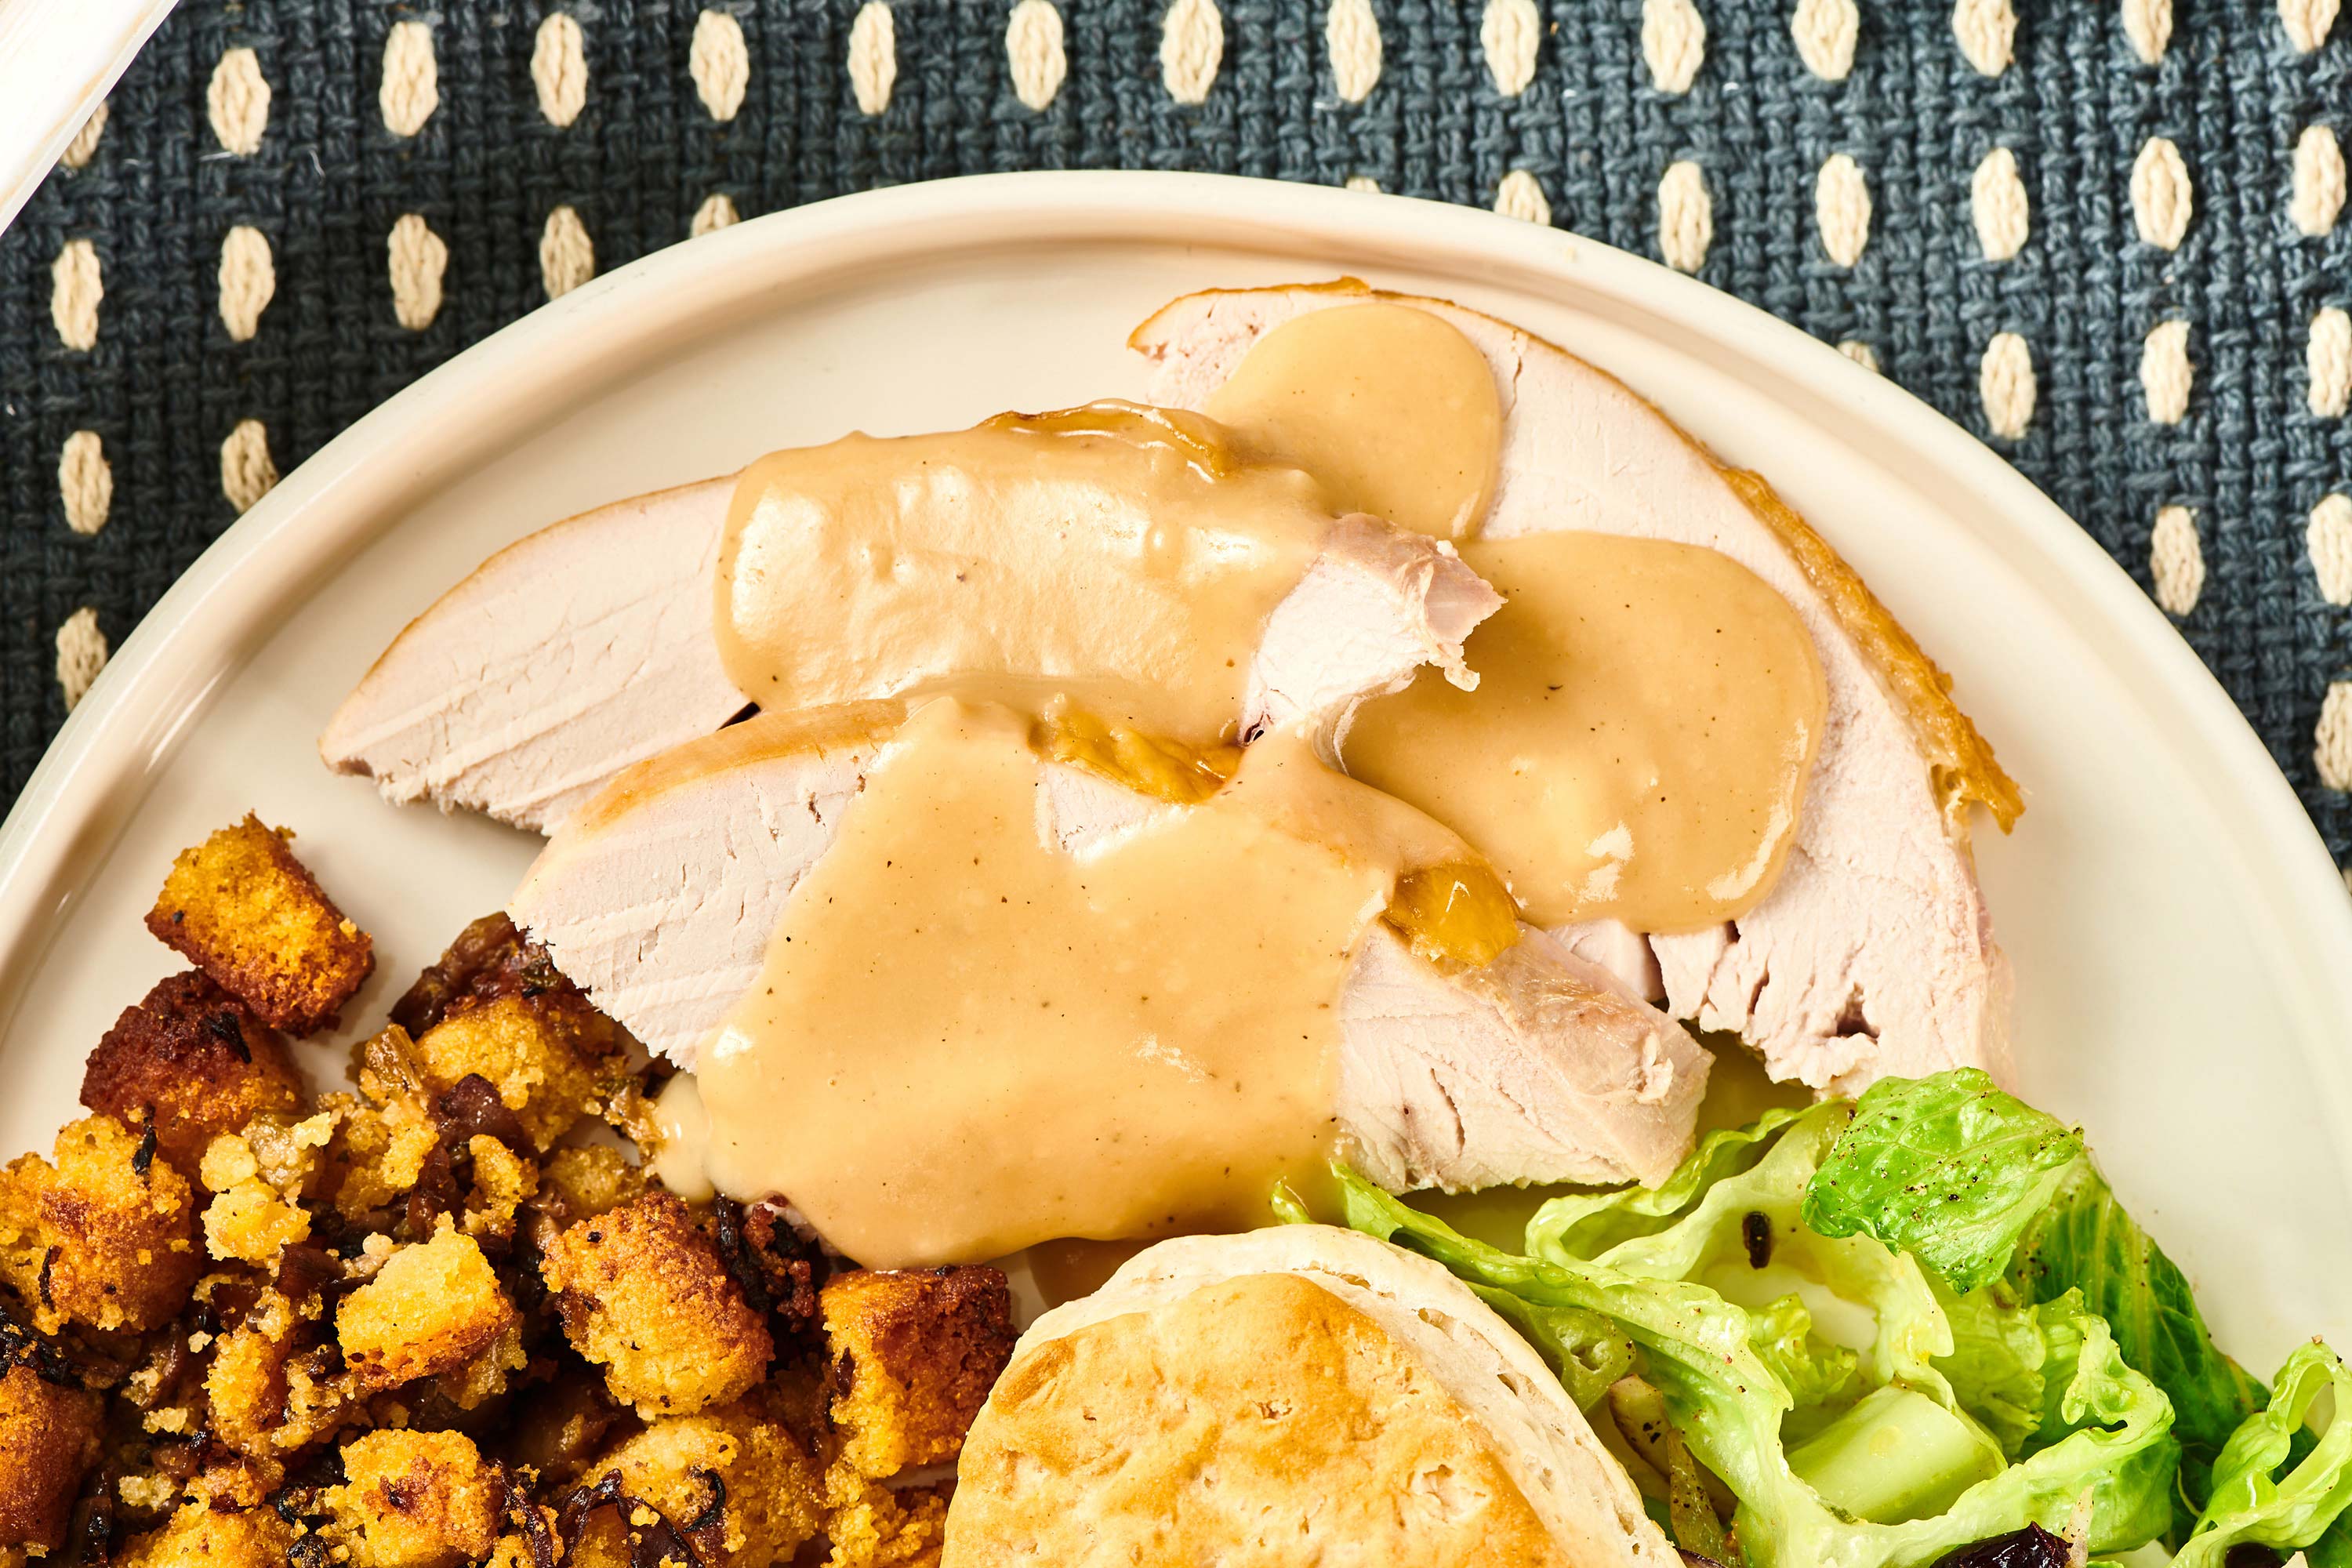
My mom almost always starts our homemade gravy the day before, and it makes the gravy-making process much faster and the results even richer. Over the years, we’ve gotten the make-ahead gravy process down. (Oh, and you might even want a white gravy recipe!) This recipe is for a traditional gravy with a beautifully deep-roasted flavor and a gorgeous color. It goes so well with the traditional Thanksgiving sides, like stuffing, candied sweet potatoes, and cranberry sauce.
By signing up, you agree to our Privacy Policy.
What's In This Post?
- Ingredients
- How to Make Turkey Gravy
- Cooking Flour in Fat: Making a Roux
- Tips for Making Smooth, Thick Gravy
- How to Keep Gravy From Forming a Skin
- How Much of the Pan Juices Should I Add to the Gravy?
- How to Make Store-Bought Gravy Taste Homemade
- Roasting Turkey Bones Before Making the Stock
- What to Serve With Turkey Gravy
- More Thanksgiving Recipes
- Make-Ahead Turkey Gravy Recipe

Make Ahead Turkey Gravy: If you start your gravy the day before, it makes the gravy making process much faster, and the results even richer.
Ingredients
You’ll make the base of the gravy the day before and then finish it off with drippings from the turkey!
- Unsalted butter – Makes the gravy super rich and, when combined with the flour, gives it a thick texture.
- All-purpose flour – The flour gets added to the melted butter to toast it before any liquids are added; the roux will thicken the gravy.
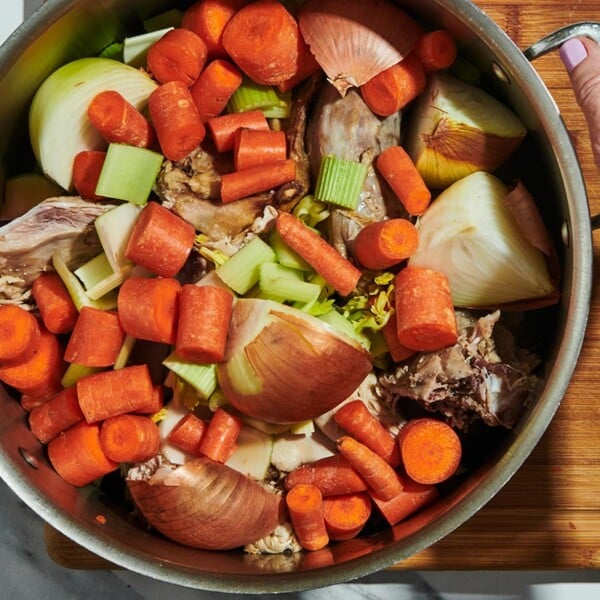
- Chicken or turkey stock – Store-bought stock is fine, but for the richest flavor, roast the turkey neck or backbone ahead of the turkey and then make homemade stock with the roasted bones. See the note on roasting bones below.
- Salt and pepper – Make sure you taste the gravy before you add salt — whether you have made the stock from scratch or bought it, it can vary a lot in terms of saltiness. Plus, when you add the juices from your cooked turkey, those will also have salt in them, especially if you brined your turkey. You may not need any additional salt at all.
- Dry white wine – The wine gets added at the end when you finish the gravy. It adds complexity and acidity, which lifts up the flavor (but the alcohol burns off).
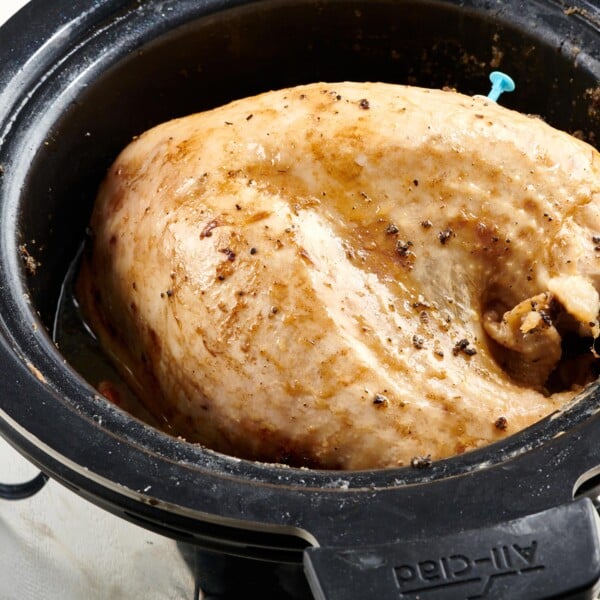
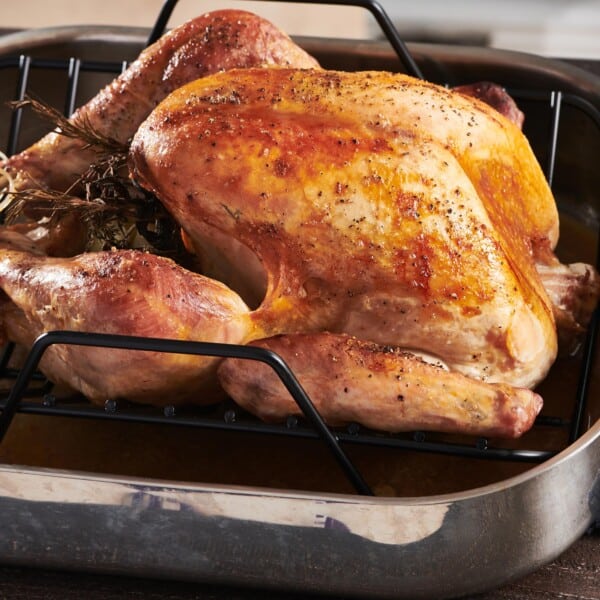
- Juices from your cooked turkey – Roasting a whole turkey will produce about 2 to 3 cups of pan juices, which is perfect for this recipe. If, for whatever reason, you have way too much juice, either double the recipe or use only 2 to 3 cups.
How to Make Turkey Gravy
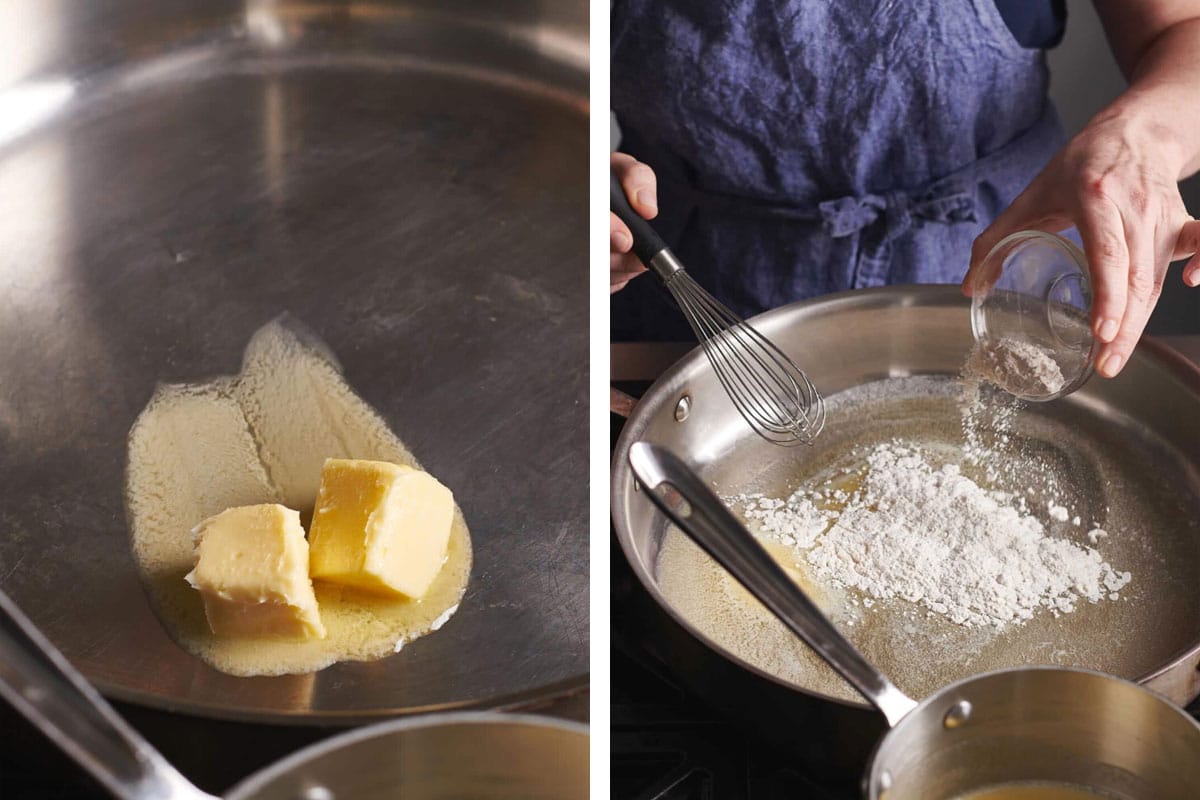
- Make the roux: Melt the butter and mix in the flour, then cook until toasty.
- Add the stock: Add the warm stock gradually, whisking to keep the texture smooth. Bring to a boil and reduce until glossy and super thick.

- Cool: At this stage, cover the gravy and cool to room temperature. Then refrigerate until needed for serving.
- Prepare the pan juices: Once your turkey has finished roasting, remove the gravy from the refrigerator. Pour the juices from the roasting pan into another dish, ideally a fat separator, and rest to let the fat rise to the top.
- Reheat: Heat the gravy base in a pot over the stove until it becomes more liquid and loose again.
- Finish: Skim the fat off of the pan juices and add the remaining juices to the pan. Add the wine as well and taste for seasoning. At this point, your gravy should be thick but still liquid, glossy, smooth, and rich. You can add some herbs if you like, and taste for salt and pepper.

Cooking Flour in Fat: Making a Roux
Gravy gets its body and thickness from flour, usually, or some other thickener. But if you’ve ever added flour directly into gravy or any other dish as it’s cooking, you probably noticed a raw flour taste. Flour should be toasted before it is incorporated into dishes (other than baked goods). The best way to do that is in some sort of fat, and the combo of fat and flour is then called a roux (pronounced roo).
In the case of gravy and many other dishes, butter is the best fat to use, and all you have to do is melt the butter, then stir in the flour and cook, stirring, over medium heat for several minutes, until the mixture starts to turn golden brown. That and the smell of toastiness is your indication that the flour is being cooked.
You can let your roux cook for a short while and take it off when it is a golden shade, or stir a bit longer and let it brown more for a deeper, richer flavor — make sure to stop before it starts to burn; trust your sense of smell.
Tips for Making Smooth, Thick Gravy
- Warming the stock before stirring it into the roux means that there is less of a chance of lumps forming.
- Adding the stock slowly and using a whisk to blend it together as you add the stock is also very helpful in making smooth gravy.
- Make sure to get your whisk into the corners of the pot where the roux may be sticking.
- Allow the mixture to come to a boil, which activates the flour’s thickening ability, then quickly turn it down and continue to simmer and stir frequently for another 10 or so minutes until thickened.
How to Keep Gravy From Forming a Skin
If you place a piece of parchment paper, wax paper, or plastic wrap on the surface of the gravy as it cools, it will prevent it from forming a skin. However, when you reheat the gravy, you will stir it all up so any skin that has formed will really blend right back into the gravy.
How Much of the Pan Juices Should I Add to the Gravy?
The answer is pretty much all of it, or for this recipe, it’s about 2 to 3 cups. If you have a fat separator (Worth it! Even for once or twice a year!), pour all of the cooking juices into the cup and wait for the fat to rise to the top. You should be able to pour out the pan juices and leave most of the fat behind.
You don’t want to waste a drop of those flavorful juices. So, if for some reason you have a lot of pan juice, more than you want for the gravy (in that the juices will thin out the thick gravy base), then just add what you want to get to the desired consistency. Keep the rest and use it in soup and stews and sauces later in the week, or freeze for another time. A little more pan juice will make the gravy richer, but thinner a little less will keep the gravy thicker.
How to Make Store-Bought Gravy Taste Homemade
No time or patience to make gravy from scratch? Use this shortcut strategy to turn a couple of cans or jars of store-bought gravy into a mop-up-every-last-drop gravy.
- Stir in the pan drippings. Use the wonderful pan drippings from the turkey (a combination of stock, juices from the meat, and fat) to give jarred gravy a homemade flavor. As a rule of thumb, use 2 to 3 tablespoons of drippings per cup of gravy. ,
- Simmer with fresh herbs. Boost the flavor of the gravy by simmering it over low heat with chopped fresh herbs added in. Try thyme, sage, rosemary, parsley, or a bay leaf. Strain the gravy before serving if desired.
- Add umami. Your refrigerator and pantry are a treasure trove of possibilities when it comes to adding more layers of flavor to jarred gravy. Just as you might add Worcestershire sauce, soy sauce, or miso paste to homemade gravy, you can also use those ingredients to add umami and depth of flavor to canned gravy. Add just a teaspoon or two at a time until you get to a level of flavor that tastes perfect to you.
- Add acidity. Add a splash of sherry wine, or sherry vinegar or apple cider vinegar to the gravy just before serving.
- Sauté some vegetables. Before adding the gravy to the pot, saute a combo of vegetables like onions (or shallots or leeks), celery, carrots, and/or chopped mushrooms. Once the veggies are soft and fragrant, add the gravy and simmer over low heat. Either strain out the veggies before serving or use an immersion blender to blend them right into the gravy until smooth.

Roasting Turkey Bones Before Making the Stock
This step is optional, but it will give your gravy an extra layer of deep flavor. Hopefully, your turkey comes with the neck bone tucked inside, which you can roast ahead of time and use to deepen the flavor of your stock and, therefore, your gravy. If, by chance, you have spatchcocked your turkey, you will also have the backbone to roast.
Simply put the bones on a baking sheet (lined with parchment or foil) in the oven and roast until dark brown. At 400 degrees, they should be done in about 35 to 45 minutes. No exact science here; you are looking for browned and somewhat crispy. So, if you have a casserole cooking at 350 degrees, place the bones on a baking sheet and slide them in at the same time. Just add another 5 to 10 minutes of cooking time.

Then, to enrich store-bought stock, simmer the roasted neck and any other available bones in the stock for about 30 to 40 minutes. Strain the stock into a liquid measuring cup and discard the bones.
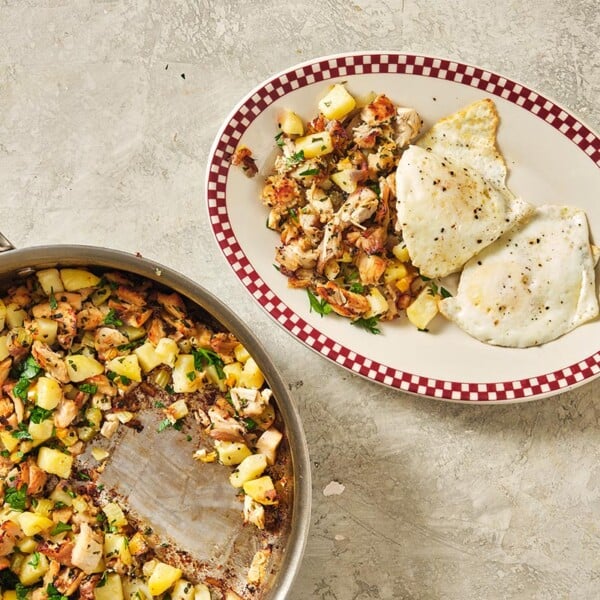
What to Serve With Turkey Gravy


More Thanksgiving Recipes
- Classic Traditional Thanksgiving Stuffing
- Sweet Potato Casserole
- Cranberry Orange Sauce
- Parmesan Mashed Potatoes
Pin this now to find it later
Pin It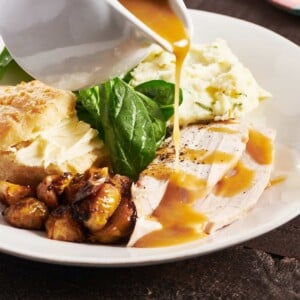
Make-Ahead Turkey Gravy
Ingredients
- ½ cup (1 stick) unsalted butter
- ½ cup all-purpose flour
- 4 cups chicken or turkey stock (homemade or store-bought; warmed)
- Kosher salt and freshly ground black pepper (to taste)
- ½ cup dry white wine (optional)
- Juices from your cooked turkey or turkey breast (2 to 3 cups)
Instructions
- Melt the butter in a medium saucepan over medium heat. Add the flour and stir until the mixture is combined; it will still be clumpy and thick. Continue to whisk frequently until it turns golden brown and the flour and butter mixture smells a bit toasty.
- Slowly pour in the warm stock, whisking all the while, until all of the stock is added. Turn the heat to medium-high and bring to a boil, whisking frequently. Reduce the heat and simmer the gravy, whisking often, for 10 minutes until the gravy is thick and smooth. It will be thick — more liquid (turkey juices, wine, and water) will be added when you finish it right before the meal.
- Place a piece of parchment paper, wax paper, or plastic wrap directly on the surface of the gravy base, cover the pot with a lid, and allow it to cool to room temperature. Put it in the refrigerator.
- On Thanksgiving (or Christmas or any other time you are making a turkey!), take the gravy base from the fridge once the bird is out of the oven. Remove the parchment, wax paper, or plastic wrap from the top of the gravy. It will be very thick from being chilled and will thin and smooth out when heated.
- Remove the bird and the roasting rack (if using) from the roasting pan, tipping the bird so that any juices that have collected in the turkey pour out into the pan. Pour all of the juices from the pan into a fat separator or a liquid measuring cup. Let the fat rise to the top.
- Place the saucepan with the gravy base over medium-low heat and heat until hot, stirring occasionally.
- If using a fat separator, pour the juices into the pot with the gravy base, then discard the fat. If using a measuring cup, spoon the fat from the top and discard, reserving the juices, then add those to the pot. Add the wine, if using. Stir to combine, taste, and adjust seasonings as needed. If, for some reason, your gravy feels too thick and you are out of pan juices, you can add some water to thin it out slightly, but that shouldn’t be the case.
- Transfer to a gravy boat or small pitcher and place right between the turkey and the mashed potatoes!


There will be 37 of us for Christmas dinner and I am excited to try this make-ahead gravy to lessen some of the chaos at meal time. I plan to roast the turkeys the day before and complete the gravy then. Would I add the wine at this point or wait until reheating for the meal? Also, how much should I increase the recipe by to have a sufficient amount of gravy for 37 people plus leftovers?
You can add the wine when you reheat the gravy – I would 4x this recipe for enough gravy for 37. Wow, you are hosting a crowd!
I’d been looking for a way to ensure I didn’t end up with a gravy that was too thin or lacking in flavor – tried it for the first time and super happy with the result! Made it the night before Thanksgiving and added pan drippings – yummy and no lumps!